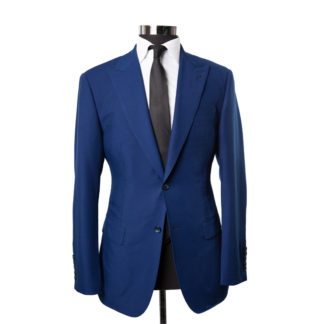
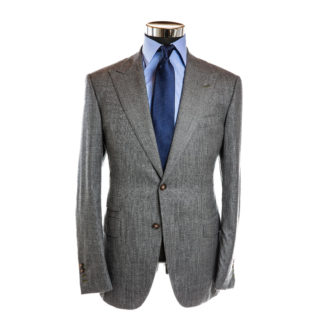
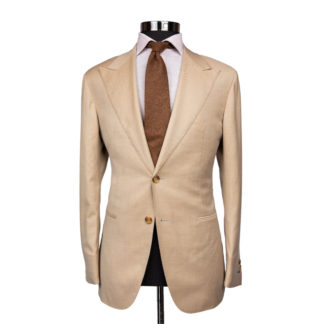
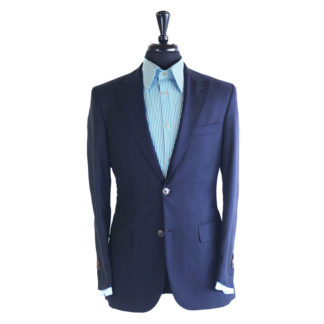
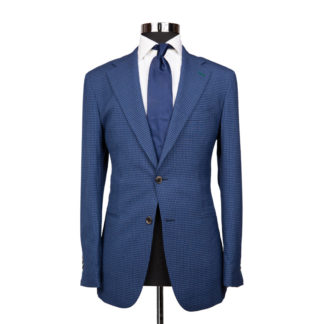
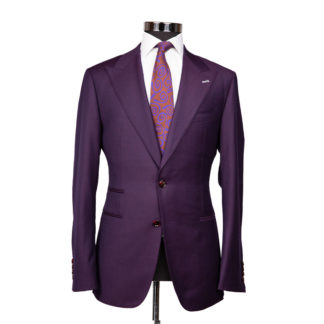
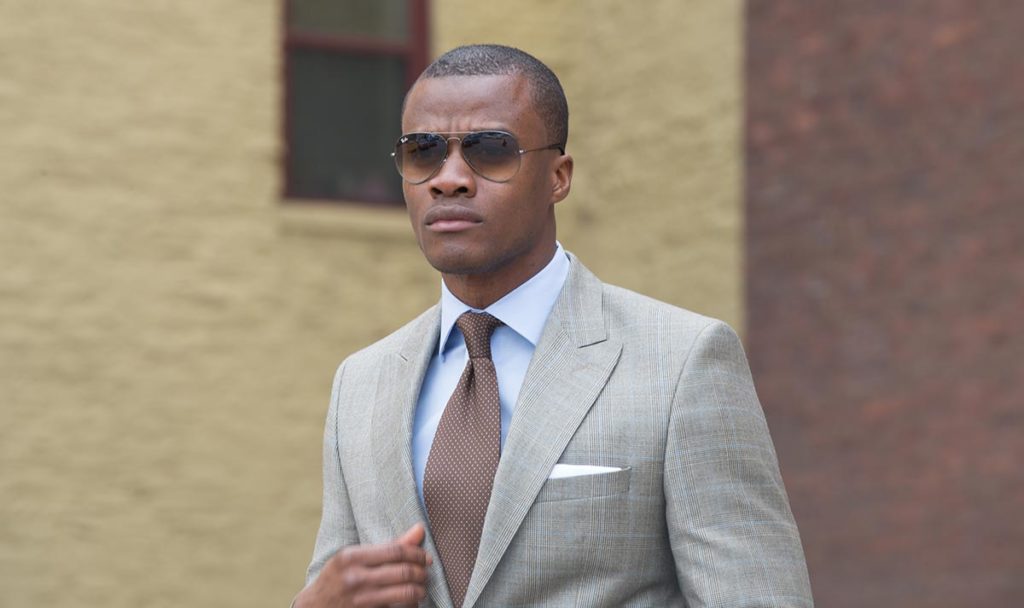
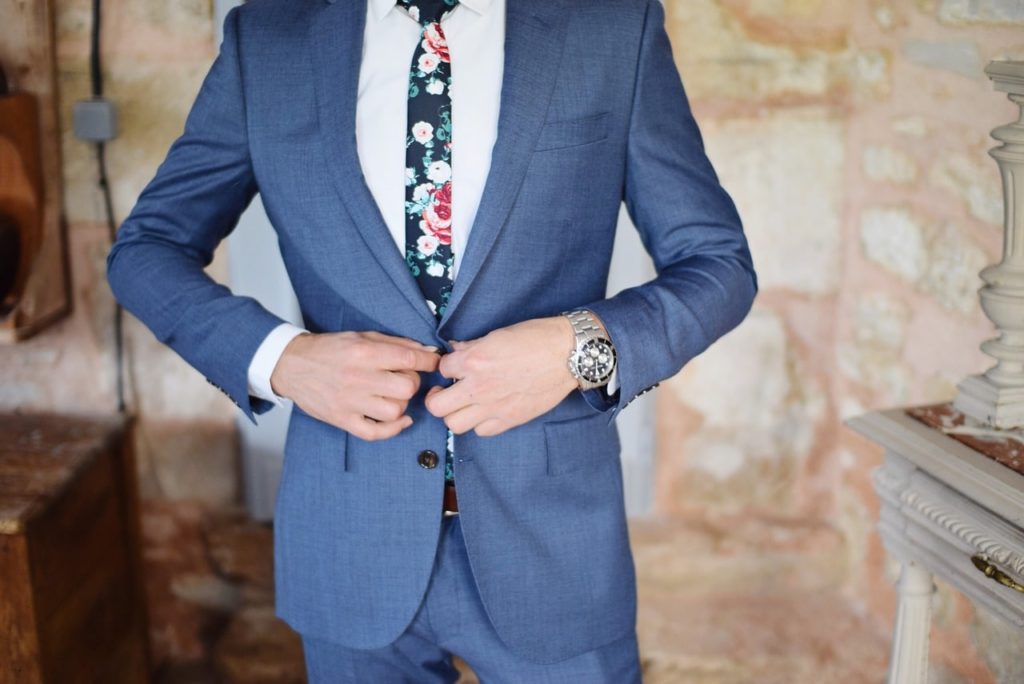
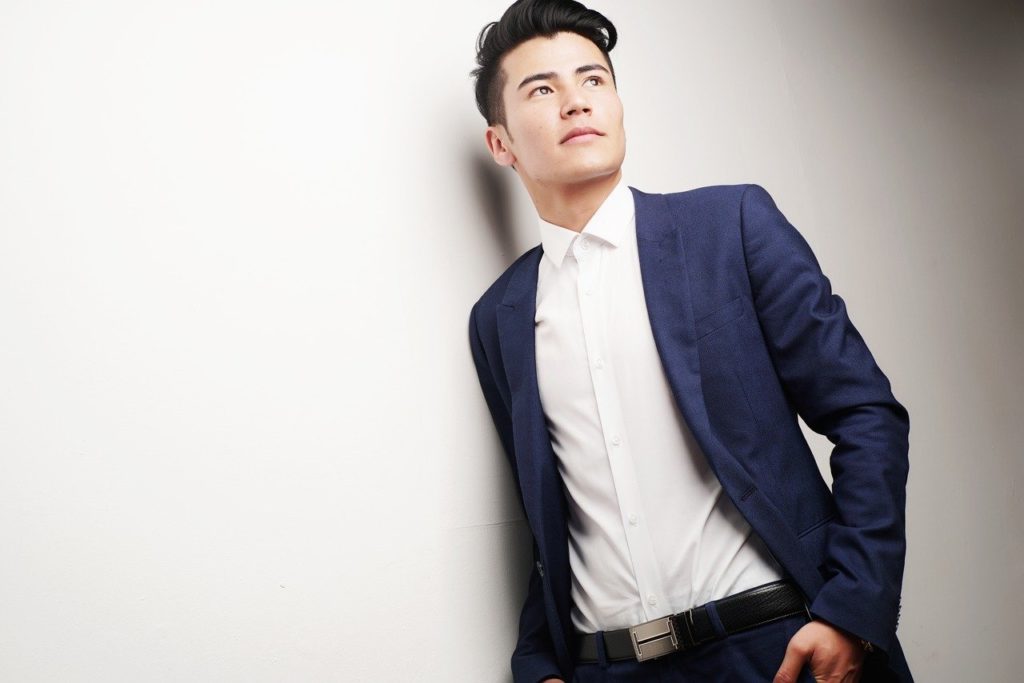
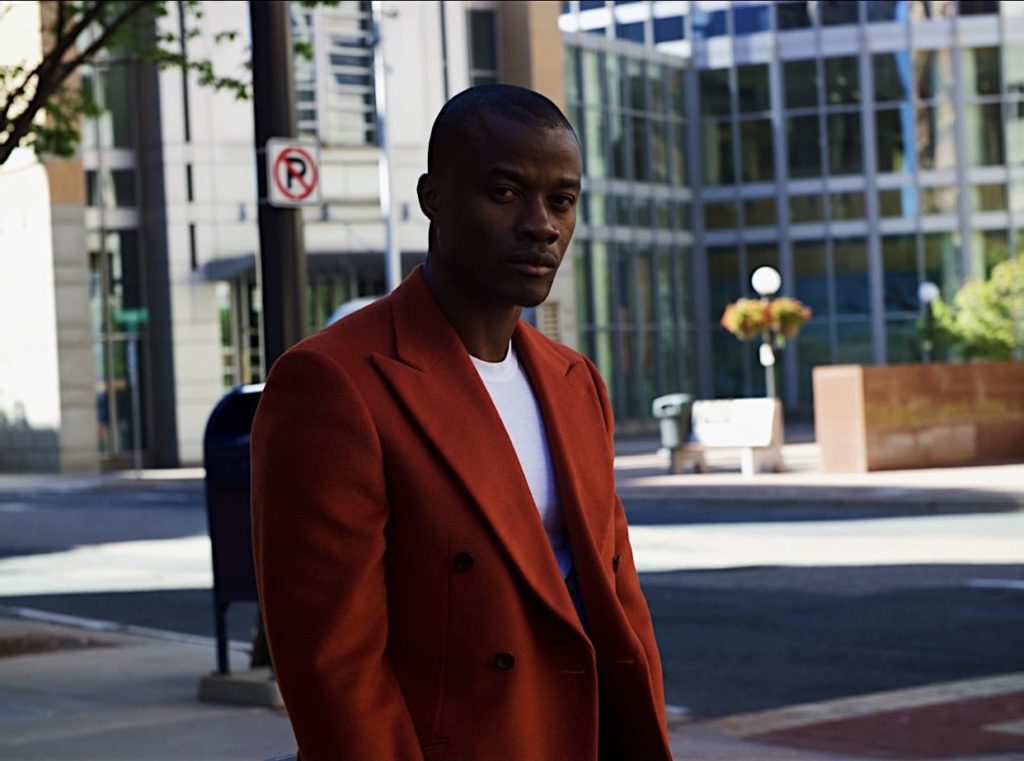
The lapel is one of the most noticeable aspects of a suit. It works to frame your shape and draw the attention of a viewer’s eye to preferred features and attributes. There are many lapel varieties and they each work for you a bit differently; they are each suited for different occasions and each do different things to work with your shape and features.
Before we get into the different styles, let’s discuss the basics of lapels. Just what exactly is a lapel? A lapel is the matching parts on each side of the jacket, right below the collar, where the fabric folds back towards the shoulders. The average width for a lapel is 3.5 inches, but they can range anywhere from 2 to 5.
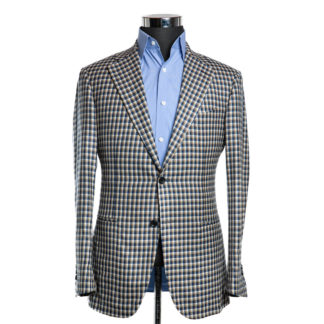
Skinny lapels have rapidly risen in popularity in recent years: they are very on trend, but it’s important to know what width is best for your body. Slim lapels work best on slim guys. If your frame is more on the broad side, avoid the slim lapel, as the proportions will be off and your body will overwhelm the lapel, making it look like it doesn’t fit properly.
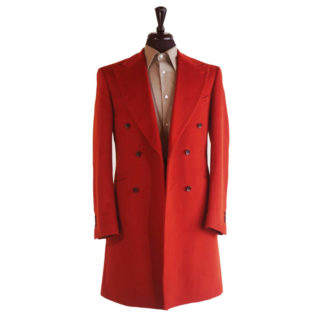
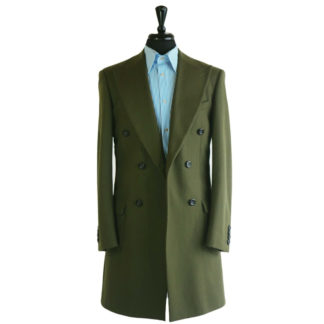
Wider lapels – in the 4 to 5 inch range – typically work best with broad frames. Our signature Wide Lapel Suit, “Houndstooth” is a classic wide lapel suit that accentuates a broad frame.
However, that’s not to say skinny guys should avoid them entirely. If you go slightly wider than average with your lapel as a skinnier guy, you can broaden your frame. Just don’t go too wide since that can let the lapel swallow your look.
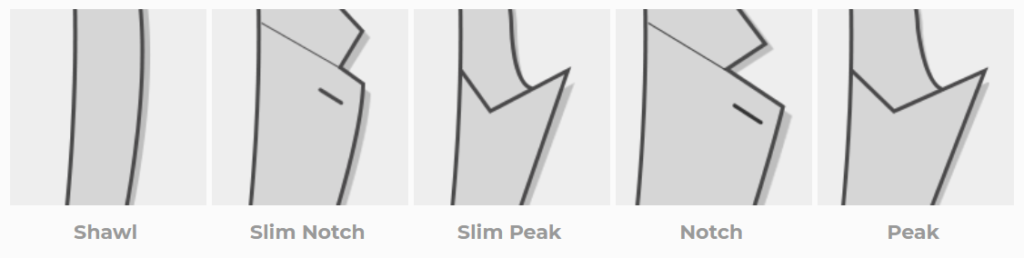
Now that we’ve covered how to find the correct lapel width for your body and situation, let’s talk about lapel varieties, or the different styles of lapels. The three types of lapels are notched, peak, and shawl. They each best work with different suit styles and on different shapes. Here are the need-to-know basics of the different styles.
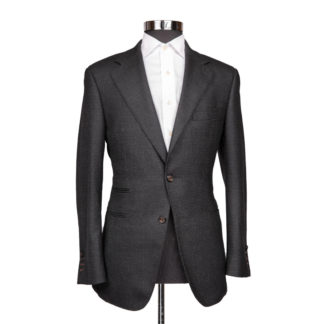
A notched lapel is the most common type of lapel. It is called notched because the two layers of the lapel meeting together form a sideways V-shape, or a ‘notch’. It’s the easiest to produce, and therefore the cheapest, but it’s also preferred for most everyday suits.
You’ll want to wear a notched lapel on a single-breasted suit. It is the standard lapel found on most suits directly off the rack. It is wonderfully versatile and works for most business attire, nice dinners, and other semi-formal events. If you only have one suit, make it a notch, as it will work for most events.
When selecting a suit with a notched lapel, you want to look at the size of the notch in comparison to the width of the lapel. They should be in even proportions: if you have a slim lapel, you want a smaller notch. If the lapel is bit wider, look for a larger notch. This helps keep the look balanced, and ensures that the lapel doesn’t overwhelm the jacket.
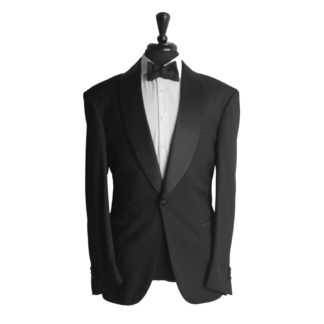
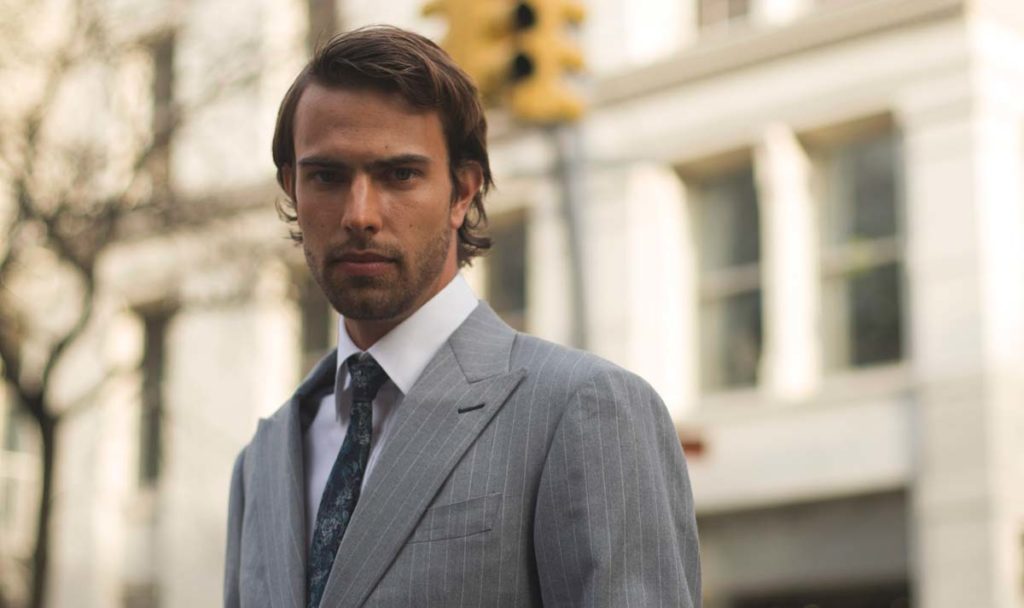
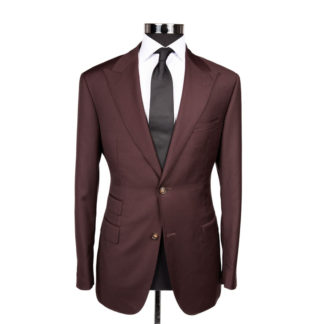
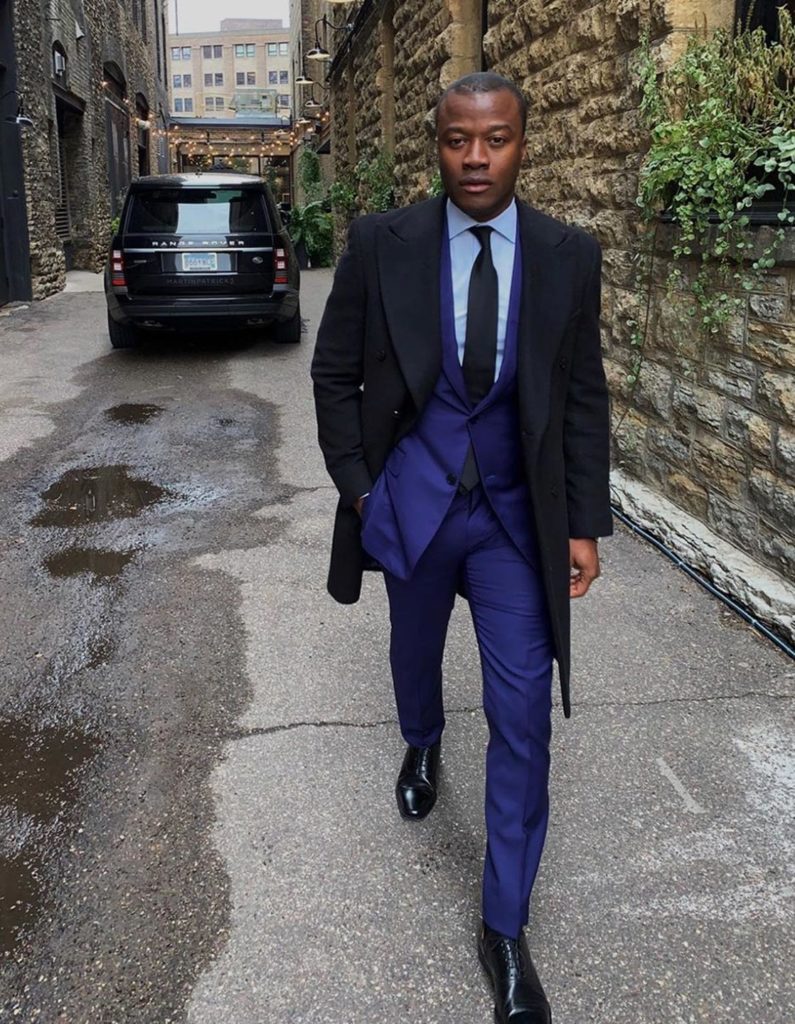
The second lapel variety is the peak lapel. It is called the peak because the lower half of the lapel has corners that angle upwards towards the shoulders. Those corners form a “peak” on each side of the jacket. It’s the most expensive style because of all the angles involved in production, but it’s got an edge to it that will always make you stand out.
The peak lapel is excellent for shorter frames because the upward angle of the peak draws the eye upwards, visually adding more height to your frame. It’s also good for more heavyset gents, for the same reason – drawing the eye up and lengthening the frame. Peak lapels are great for more formal events or situations: executive-style business meetings or functions, galas, formal weddings, or parties that call for evening-wear.
For the width of a peak lapel, you want to avoid going too slim. That’s because it can look cluttered and you can lose some of the detail when making a peak too small.
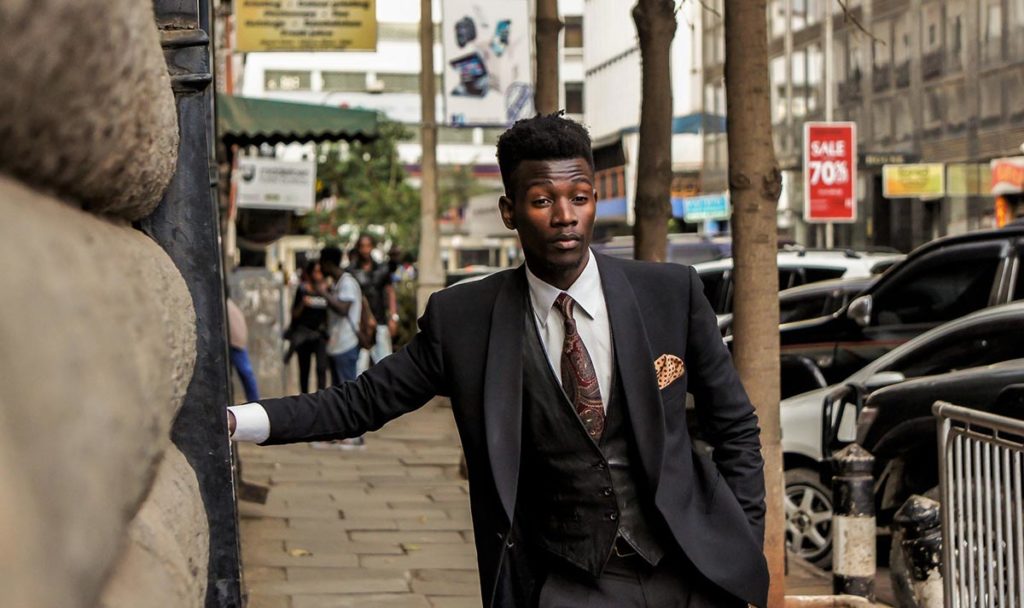
The shawl lapel foregoes any edges; it rounds out in a continuous curve, no notches or peaks to be found. It is best to opt for a thinner, slimmer lapel if you’re going to be wearing a shawl style jacket – it makes for a sleek look. Shawl lapels aren’t the best choice for heavier guys or those with a round face, as the curve of the lapel can accentuate the curves of the body and face. The shawl lapel is almost always limited to tuxedos and black tie events – it’s used in only the most formal of situations.
As we’ve discussed here, lapels are important. They are one of the most stand-out aspects of a suit and the lapel varieties require quite a bit of consideration when you’re browsing for your look. There are many things to consider, the most major ones being your shape, the lapel width, and the lapel style. Now that we’ve discussed the basics, and some of the more in-depth concepts surrounding lapels and the lapel varieties that are available, you’re armed with all the info you need to find the perfect lapel, just for you, right here at HARTTER MANLY. Check out some of the lapel varieties on our Suits or Sports Jackets.
They say a lot about who you are as a person. But just as important is ensuring that your hair works with what you’ve got. It’s not a one-size-fits-all situation: different styles work with different face shapes. Like you want your suit to work with your body, you want the best hairstyle for your face shape. The best hairstyle will use angles, lengths, and textures to accentuate features you love and minimize features you’re not such a fan of.
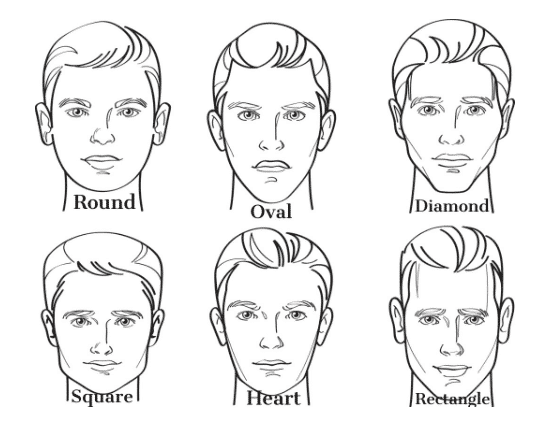
A round face has similar width at the forehead and chin, with rounded edges. That means that the cheekbones are the widest part of the face.
An oval face is similar to round, in that it has rounded edges at the forehead and chin. The main difference is that the length of the face is a bit longer. In this case, the face is longer than it is wide. Like a round shape, the widest part of the face is the cheekbones
A diamond face also has the widest part of the face being the cheekbones, but the forehead and the chin come to points. Compared with an oval face, a diamond face has a more drastic angle inward.
Square faces are just that: squares. They typically have similar widths the whole way down. The forehead, cheekbones, and jaw are all about the same distance apart. Additionally, this face shape has a relatively flat chin. The length of the face is close to the width going across, which gives it a uniform shape.
Heart face shapes have broad foreheads and pointy chins. The lines follow an inward trajectory the whole way down from top to bottom. Therefore, the widest part is at the forehead and the narrowest part is the tip of the chin.
Rectangle faces, like squares, have similar widths going from top to bottom. The difference is that the overall length is a bit longer than the width.
If you have a round face, your best bet is to keep the sides short. However, it’s crucial that you don’t round out the haircut where the top meets the sides. You want to have a sharper angle in that transition to create the illusion of more angles in your face. Additionally, it’s best to keep the top a bit fuller. Buzzing it will only accentuate the curve at the top of your head, which widens the cheekbones, which most men want to minimize if they are the widest part of the face.
Keep a bit of length up top. You have a number of options, but as long as the top is longer than the sides and the intersection of the two has an angle, you’re good to go. You can keep the top spiky and textured, or you can comb it over and slick it back, or you can wear it longer and down over one side of your head. The best hairstyle for your face shape all depends on if you’re going for a more classic look, or something more on-trend and modern.
With oval faces, your goal is to balance out the proportions. We know it might seem counterproductive to keep your hair longer on the top and shorter on the sides. But you have to look at the hair and the face in this case as two separate entities. If you have a contrast between the top and the sides, then it will act as its own shape to complement the oval. That is, in contrast to diminishing it or accentuating it.
Diamond faces require some finessing. The best hairstyle for you is one that creates a softer look. Essentially, fewer angles in the hair will balance out the sharp angles of the face. You want the top to be a bit longer than the sides, but don’t make this contrast too drastic. For instance, avoid close fades on the sides. Having a bit more length on the sides will broaden the otherwise narrow forehead. Another thing to avoid is having a fringe that hangs over your forehead. This will make the forehead look narrower than it already is. Keep the sides a bit longer, and the top a bit longer still, but avoid too much contrast. And definitely don’t go too short with the sides.
Square faces are typically the easiest shape to work with. You have lots of options. The goal is to accentuate your face shape, rather than diminish certain aspects of it. Rejoice! You’ve been blessed. One way to accentuate your face shape is to keep the sides pretty tight. Doing so will highlight the equal proportions you have all the way down your face. You can pretty much do whatever you want with the top. For instance, some things that work especially well are undercuts. An undercut is a style where the top does not connect with the sides, or one in which there is no blending between the top and sides. The undercut is a really fun, edgy haircut that doesn’t work for a lot of shapes. So if you’re interested in rocking it, go ahead! You can get away with it.
Heart face shapes have relatively mismatched top and bottom proportions. Therefore, your goal is to balance the two out. The best hairstyle for you has considerable length on the sides. Long sides increase the appearance of width in the cheekbones. One option is to grow a fringe that sweeps across your forehead, to diminish the width you have there. Or, you can wear it up but keep it proportional to the sides. The goal is to keep the sides and the top at similar lengths. Too short on the sides and it emphasizes the width in the top half, while too long on top makes the upper half appear too heavy. Balancing the lengths on the top and the sides can even out your overall face shape.
When you have a rectangle face shape, your goal is to avoid elongating your face any more than it already is. In this case, your best best is to keep the top and the sides pretty close in proportion. If you have a look that is more top-heavy, then it will draw out the length of your face. To avoid that, keep the top and the sides at pretty similar lengths. In addition, you don’t have to worry about having too round a transition between the top and the sides, as that will help to balance out the angles of your face.

As you can see, as much as you want to choose a style that suits who you are as a person, it is also crucial that you choose something that works with what you already have. Even for the most difficult face shapes, there are lots of options – the number one thing to remember is your proportions. You can do lots of different things with each of these face shapes, as long as the proportions and length ratios work with your face, rather than against it. The next step is to get your beard groomed to perfection. Use these tips to go forth and get yourself a cut that puts your best foot – and face – forward.

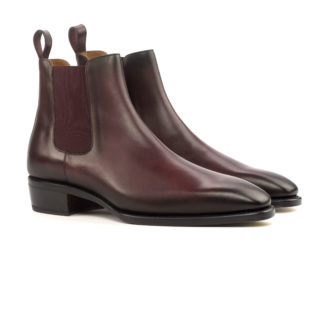
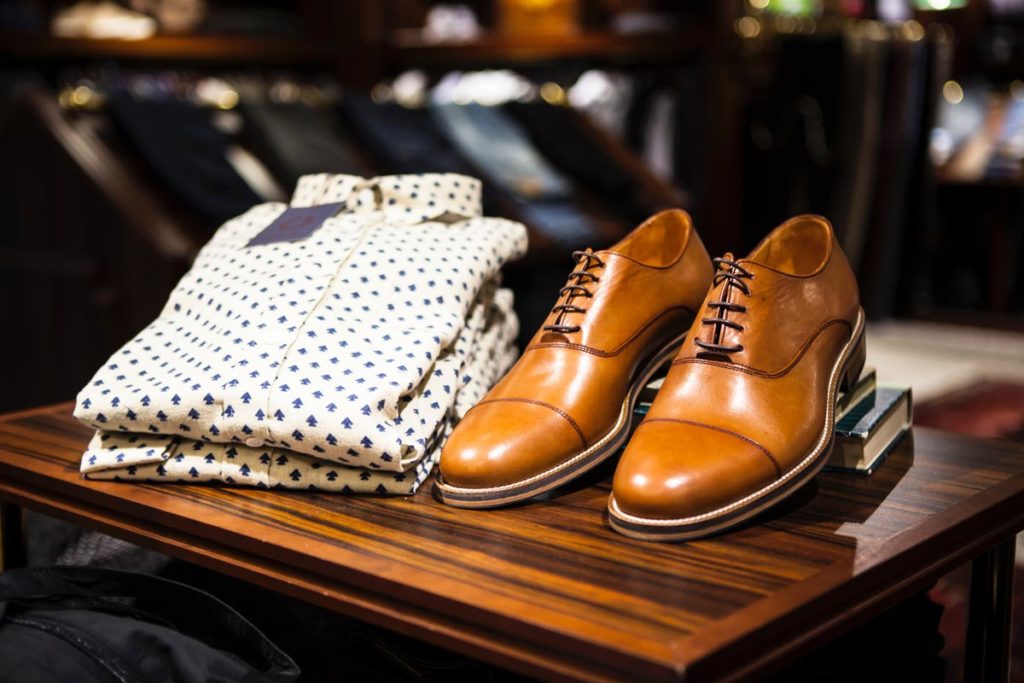
You’ve got the suit, but to make your look really pop, you need to be sure your shoe style matches the statement you’re trying to make. The shoe styles you wear can make or break a look; that’s why it’s so important to select the right footwear for it. We’re going to talk about different footwear styles for men, and what looks they most complement.
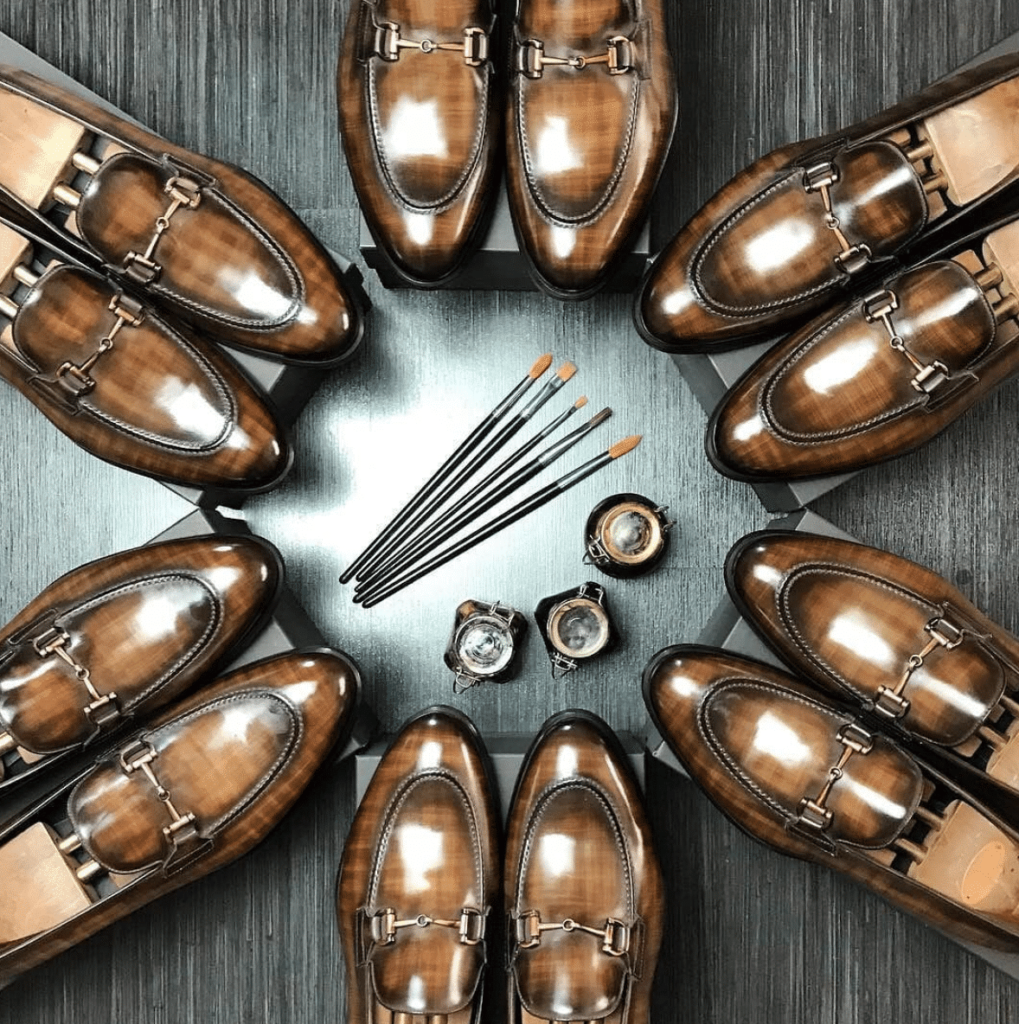
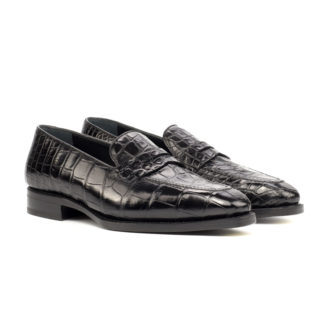
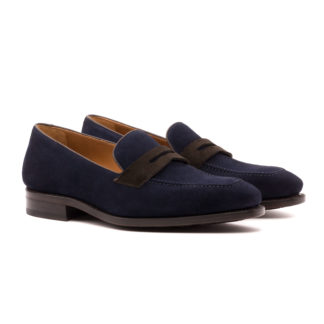
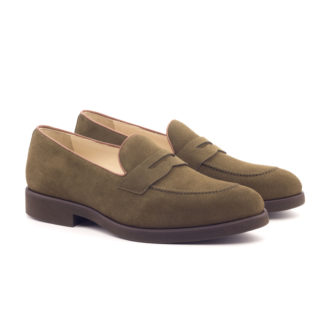
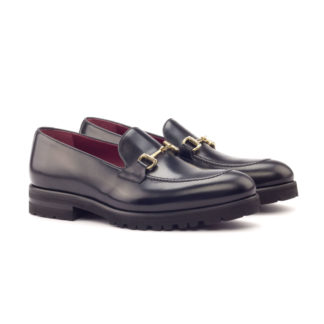
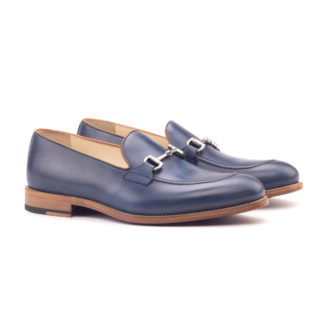
Loafers are among the more casual shoes on this list. They do not have any sort of lacing or fastening system. Instead, they are designed to be slipped on. They are therefore not quite suited for evening wear. Let’s discuss the wide variety of loafer styles, including the penny, the bit, and the tassel.
Penny loafers rose to prominence in the 1950s. The name comes from the strap of leather that runs across the forefoot. Specifically, the leather strap leaves a small diamond cut-out that has just enough room for a penny. In the early days of loafers, many men did in fact keep a penny in that slot. Some theories exist about why they kept a penny. One or two pennies could, for instance, buy a call in a phone booth. So obviously you’d be smart to keep some pennies handy!
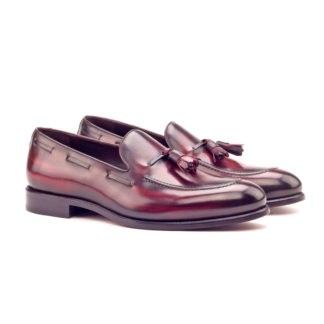
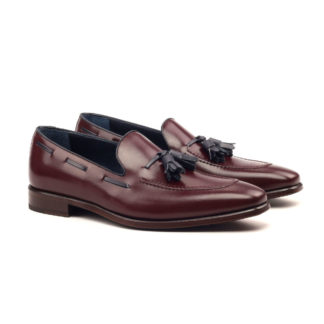
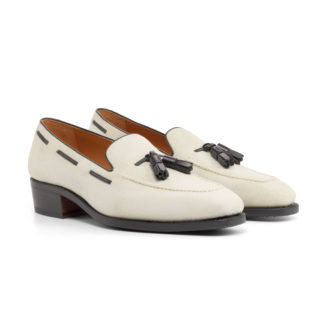
Compared to penny loafers, tassel loafers are a bit flashier. In addition to the pair of tassels, they also have more decorative lacing across the top. To leave room for the tassels, these loafers typically have lower vamps. The vamp is the piece of leather that covers the space between your toe and ankle. A low vamp is one that ends closer to the toe. A high vamp, on the other hand, ends back towards the ankle, and closer to the middle of the foot. Many people typically consider low vamps as more suitable for those who are up there in years. But really, a man of any age can rock them. Just promise to avoid wearing them with full business suits. You can get away with darker denim or mismatched suit combos.
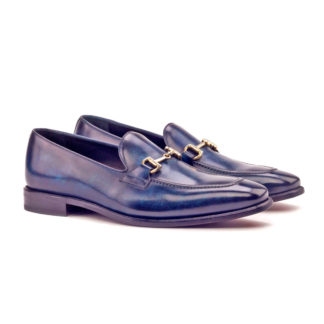
Bit loafers have a bar of metal that runs over the top of the shoe. You may also know them as Gucci Loafers, because Gucci developed the design first. Gucci put the loafers on the market to strike a balance between comfort and style. Specifically, the bit style allows men to wear laid-back footwear to dressier events. If you tend to dress on the more conservative side, you may want to forgo bit loafers when wearing your finest suits. Instead, you can wear bit loafers with dark denim or interesting suit and trouser combos. If you want to make a statement, however, wear them to business meetings. As a general rule, though, bit loafers are not a good match for tuxedos or black-tie events.
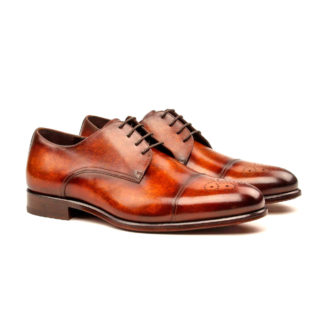
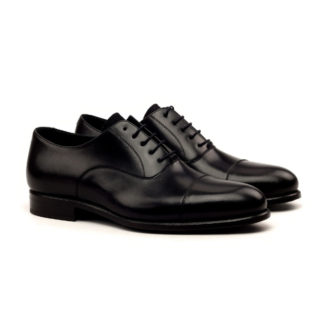
Derbies – or Bluchers, if you prefer – are lace-up shoes, typically lower-cut. They have an open-throat lacing system. The lacing system on a shoe depends on two elements: the vamp, which we mentioned above, and the quarters. The vamp is the piece of leather that sits over the middle portion of the top of the foot. The quarters are the two sides of leather that wrap around the heel and meet at the front of the ankle. In addition, you will see the eyelets located on the front of the quarters.
Open-throat lacing means that the quarters are on top of the vamp, which leaves the edges of the quarters exposed. Closed-throat lacing, which you will find on Oxfords, means that the quarters are stitched under the vamp. In this case, the edge is not exposed like it is with open-throat lacing. We will explore more about Oxfords next.
Having the edge of the quarters exposed provides more give and stretch. For that reason, Derbies are great for guys with feet that are on the larger side. As a result of the lacing, however, they are a bit bulkier. As a rule, formal shoes should be more streamlined, so the open-throat lacing is better suited to more casual looks.
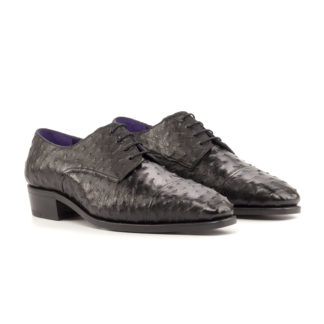
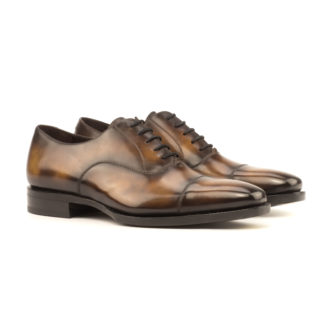
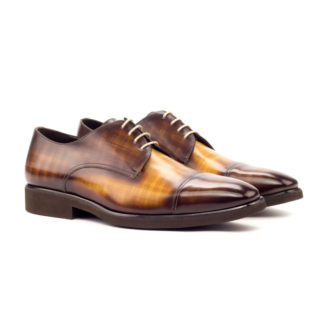
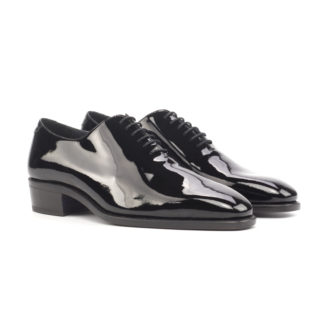
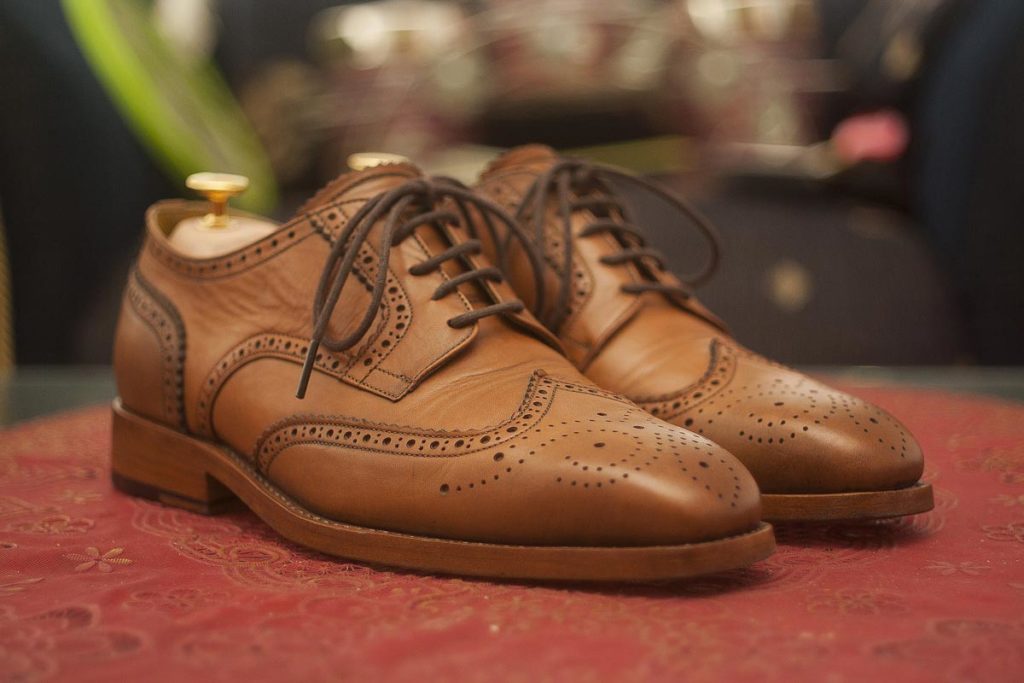
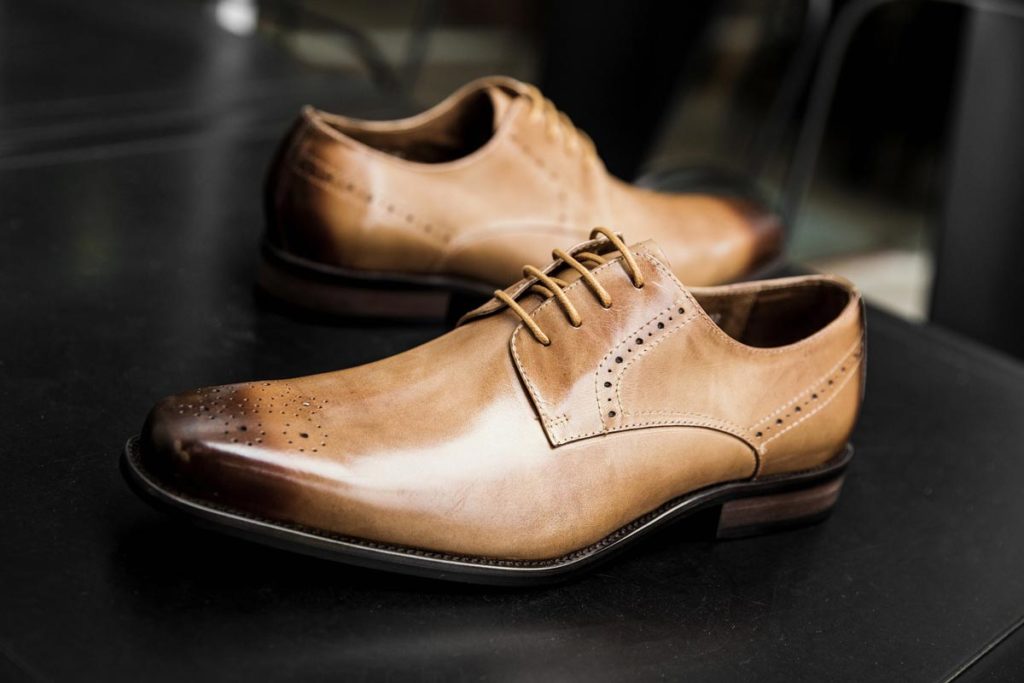
Most people know Oxford as the quintessential business shoe. Oxfords are similar in construction to a Derby shoe, in that they are lower-cut and lace up. But the key difference is that Oxfords have a closed-throat lacing system. As you can see in the above picture, they tend to look a bit neater. Since they are more streamlined, they are well-suited to business looks. This style goes best with matching suits and evening wear. They do, however, have a less forgiving fit. That is due to the lack of give that comes with the closed-throat lacing. Despite that, the Oxfords are the most essential dress shoe to have in your wardrobe.
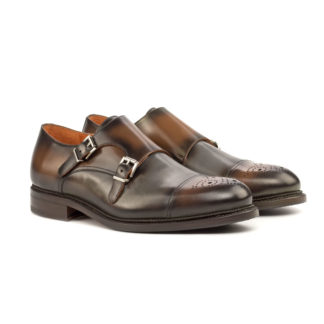
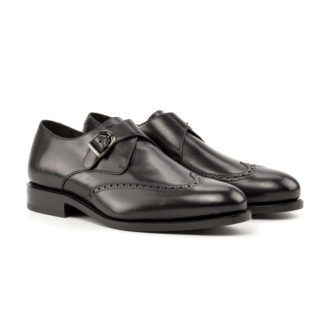
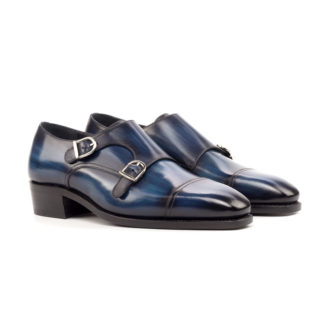
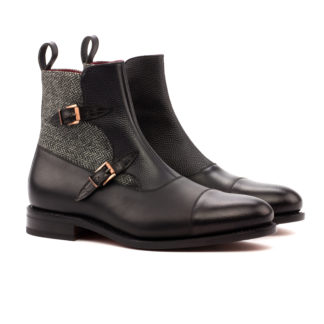
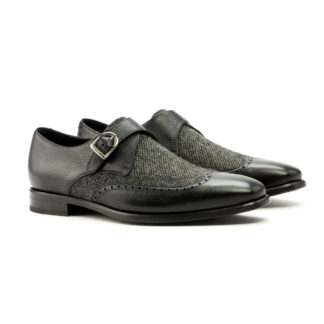
Monk straps, by definition, are any shoes that use a buckle closure rather than laces. They come in a variety of styles, but the core concept remains the same. Monks are definitely on the flashier side compared to the other styles we listed. They are less formal than a closed-throat lacing system, but you can dress them up if done properly. For instance, you could wear a pair of black patent leather monk straps with your suit. Essentially any other color or material besides that is better suited to a mismatched suit combo or darker denim. The welt style you choose also affects the look of the shoe.
The double monk strap, then, is a monk strap shoe with two buckles instead of one. Compared to the single, the double gives a contemporary, bold look. Some of the more conservative among us say it’s too flashy. But it’s not too flashy if you’re all about edge and setting yourself apart. If that’s what you want, then the double monk strap is the perfect fit for you.
Let’s consider the formality of both styles. Generally, the more ornamentation a shoe has, the less formal it is. As such, most consider the single to be a touch more formal than the double. Experts do not typically advise wearing them to a black-tie event. And you should especially not wear them with a tuxedo. But really it all depends on your level of daring and the message you want to send with your look.
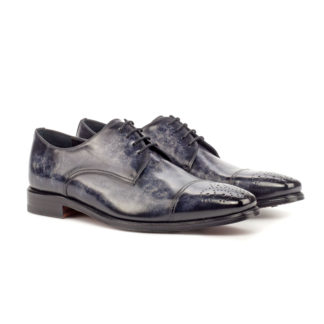
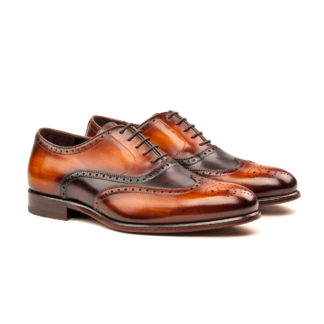
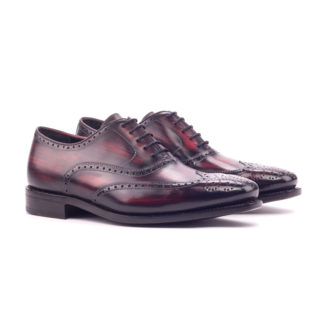
A brogue is any shoe that has decorative perforations in the leather. Contrary to the rule that more ornamentation means less formality, Brogues are more formal than Derbies. However, they are definitely less formal than an Oxford. Instead, brogues occupy the sweet-spot between the two.
There are a few different aesthetic elements of brogues: perforations, pinking, and medallions. Perforations are punch-out holes in the shoe leather in a decorative pattern. Pinking is a decorative edge created by pinking shears. In the end, the edge looks like a series of triangles. Medallions are similar to perforations, in that they are also punch-out holes in a decorative pattern. The difference is that you will find medallions specifically on the toe of a shoe.
Brogues, as a style, also include wingtips. Specifically, wingtips are a style in which perforations are on the vamp. They are called wingtips because the decorative perforation is shaped like bird wings. A variation on wingtips is longwings. Compared to wingtips, the ‘wings’ in longwings stretch all the way around the collar of the shoe. All longwings are wingtips, but not all wingtips are longwings.
We’ve discussed a number of popular shoe styles for men in this article. However, the honest truth is that there are so many more styles out there. The shoes we selected to highlight today were picked because they are most commonly worn with suits. Common footwear styles as these are essential to have in your closet for all the different events you dress up for. One thing is certain: just like suits, there is no one style that is appropriate for every occasion you may find yourself at. Therefore, we’ve gone over these to allow you to build a basic footwear collection. In addition, that footwear collection will complement a wide variety of styles. Check out what is available in the HARTTER MANLY Leather Shop. After all, a look isn’t complete when you put on a suit. It’s complete when you dress yourself up head-to-toe.
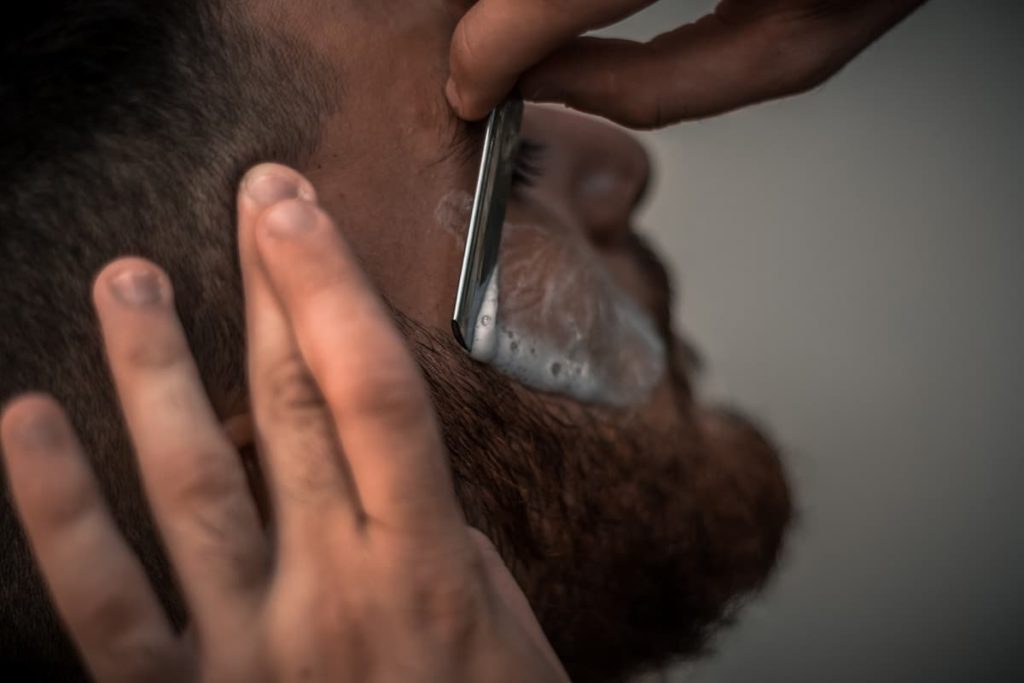
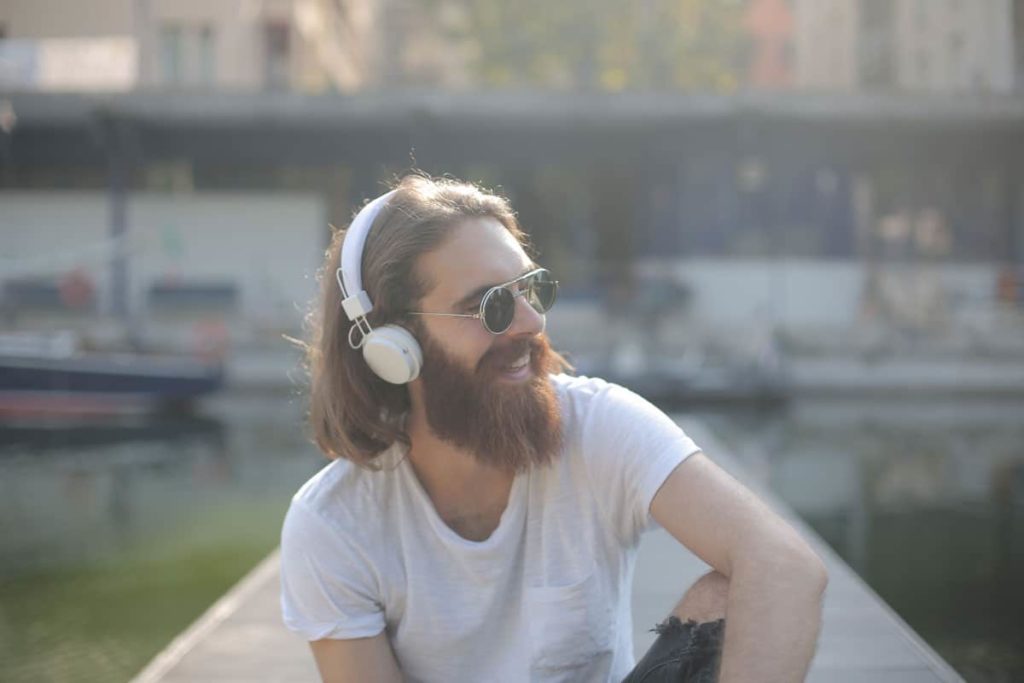
Beards have been on trend for the majority of human history. The first recorded instances of barbering as a profession date all the way back to 5000 B.C. No matter where or when you look in history, facial hair in all its varieties have been staples of men’s grooming and fashion. Considering growing one? Already have one and want to up your beard game? When compared to the hair on your head, a beard is in a league of its own: you also have to treat it right, but there are an entirely different set of rules for facial here. Here are H|M’s beard basics: the do’s and don’ts you always want to keep in mind.
One common mistake men make is using head shampoo on their beard. But you can’t approach beard maintenance with the mentality of “Hair is hair, what does it matter what products I use?” The fact is, the hair on your beard is much different from the hair on your head. It’s thicker, coarser, and more wiry. In order to properly cleanse the hair on your head, hair shampoo strips more of the natural oil your body produces. You need more of those oils in your beard to keep it smooth and nourished. That’s why you need to use a dedicated beard wash. It cleanses the beard and skin underneath without stripping away too much of the oil. And while you’re at it, add a beard conditioner or oil to your beard regimen. Doing so can help supplement your natural oils to keep the beard extra soft and healthy.

A common misconception about beards is the idea that bigger is inherently better. But actually, to make the most of a beard you want it to look neat and tidy. Sure, a thick, full beard is glorious. But if you pay no mind to shaping and trimming it regularly, you will look disheveled at best and like a caveman at worst. This is easily solved by investing in a quality beard trimmer. Or better yet, visiting your local barber. However, if you really must do it yourself, do plenty of research before giving it a go.
Not only will brushing your beard daily help maintain a neat, well-groomed appearance, but it also helps distribute the natural oils through the hair. Natural oils keep it nourished from root to end. Use a wooden, wide-toothed beard comb or a boar-bristle brush. If you want to keep it looking extra clean, blow-dry your beard a few times a week. Brush through your beard from the inside so the bristles face out, and direct the blow-dryer down as your brush through it. Keep the dryer on the warm setting. That’s because too much heat can cause the beard to become brittle. However, no heat at all will keep it from drying in a timely fashion.

A quality beard isn’t just about the shape, it’s also influenced by the lines. That is, where the beard stops and starts on your face. Where you place your lines can drastically affect the look of your beard. A common mistake men make is cutting the neckline too high. A simple way to get a clean, well-placed line is to start with a guide. To do it, press your trimmer flat against the line below each of your ears, then work your way to the center. Keep the line balanced along the point where your head meets your neck, just above your Adam’s apple. The angle and lines of your beard should accentuate your jawline, not expose it.
Depending on the style you’re going for, mustache widths and lengths vary. One thing to definitely avoid is cutting your mustache too short in comparison to the rest of your beard. Basically, you want the two to be balanced, and keeping the mustache too short can throw that balance off.

Yes, this is a blog about beards, but the sideburns are also a crucial element. They need to be kept in check, and letting them get too unruly will widen your face. For instance, if you keep a short haircut on the sides and a thick beard, you need to be sure the sideburns taper in between the two lengths. Keep them shorter at the top of the ear and gradually getting longer as you move into the bulk of the beard. While you may be able to trim the bulk of your beard yourself, consider visiting a barber for your sideburns. Tapering sideburns requires a technique that really should be done by someone with experience.
Through our own research and personal experience, we do have some favorite tools and products to up your beard game. As a note, we are not affiliated with these brands. They are simply products we love, and we want to pass our knowledge of them on to you.
There are countless beard trimmers with a wide variety of features on the market. But if you’re looking for one ultimate tool to keep in your arsenal, check out the Hatteker Beard Trimming Kit.

You can find it on Amazon for $50, which is a great price even if you were just purchasing the trimmer itself. Instead, you get the trimmer, with an LED battery life display, so you never end up with a dead trimmer and a half shaved beard. Also included in the kit is a hair trimmer head, a beard trimmer head, a detail trimmer head, a body groomer head, a fine-point nose and ear trimmer, and six guide combs (one of which is fully adjustable via a dial). The machine itself also has an adjustment switch to get lengths in between the available comb options. It has a full sixty minutes battery life and has everything you need to look fresh, head-to-toe.
In terms of products, Billy Jealousy is a brand we’re fans of. They have a whole range of beard-centric products, including waxes, washes, conditioners, aftershaves, oils, and more. They’re made in America, cruelty-free, and use natural ingredients. We love them for leaving harmful sulfates, parabens, and pthalates at the door. If you’re looking to get a collection of beard products going, start with their Devil’s Delight Beard Kit.
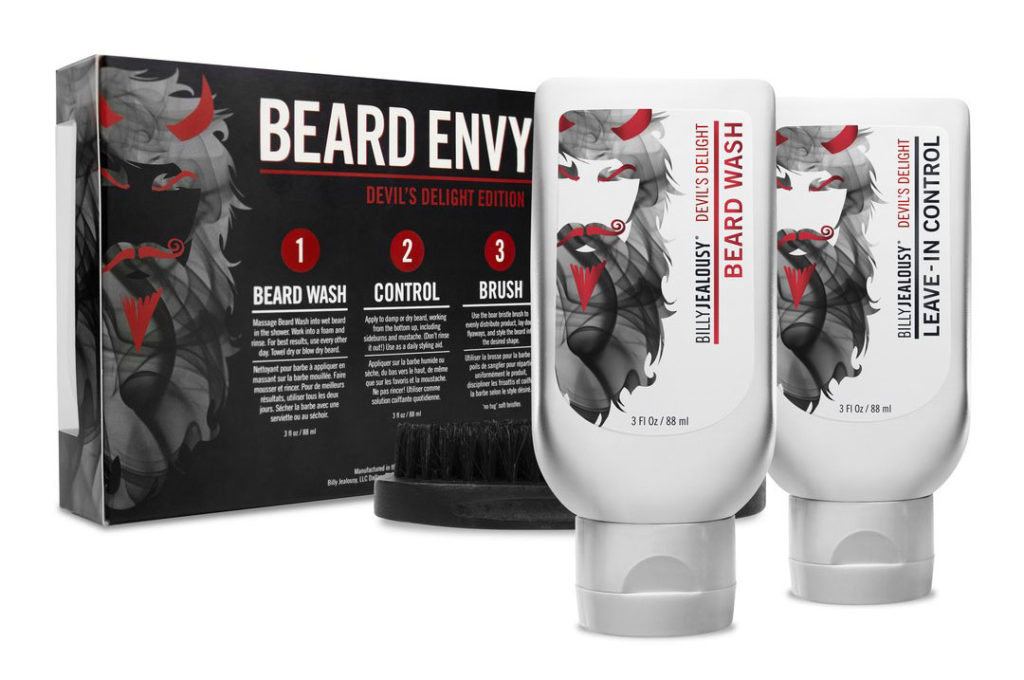
For only $25, you get full-size bottles of their beard wash and beard conditioner in the Devil’s Delight scent. Devil’s Delight is an intoxicating mash-up of sweet black pepper and sandalwood. It’s a favorite among clients of our barber on staff. Also included in the kit is a boar-bristle brush – densely packed with bristles and soft on the skin. Use the products and brush daily to keep your beard looking fresh.
As mentioned above, beards are a tale as old as time. They’re a men’s grooming staple, and growing one can undoubtedly accentuate your look and make a statement about who you are. But they are their own sort of animal – they require a completely different level of care than the hair on your head. Use H|M’s beard basics tips, tools, and products to put your best face forward, and grow a beard that some men can only dream about. Rock the beard, gentlemen, but always, always remember to do it right.
Your wedding is one of the most important days of your life, and you want everything to be perfect. A big part of that is making sure the wedding party looks great. And that includes the groomsmen attire! The pictures taken will be something you cherish forever. Here is HARTTER MANLY’s guide to ensuring your groomsmen party looks awesome on your big day.
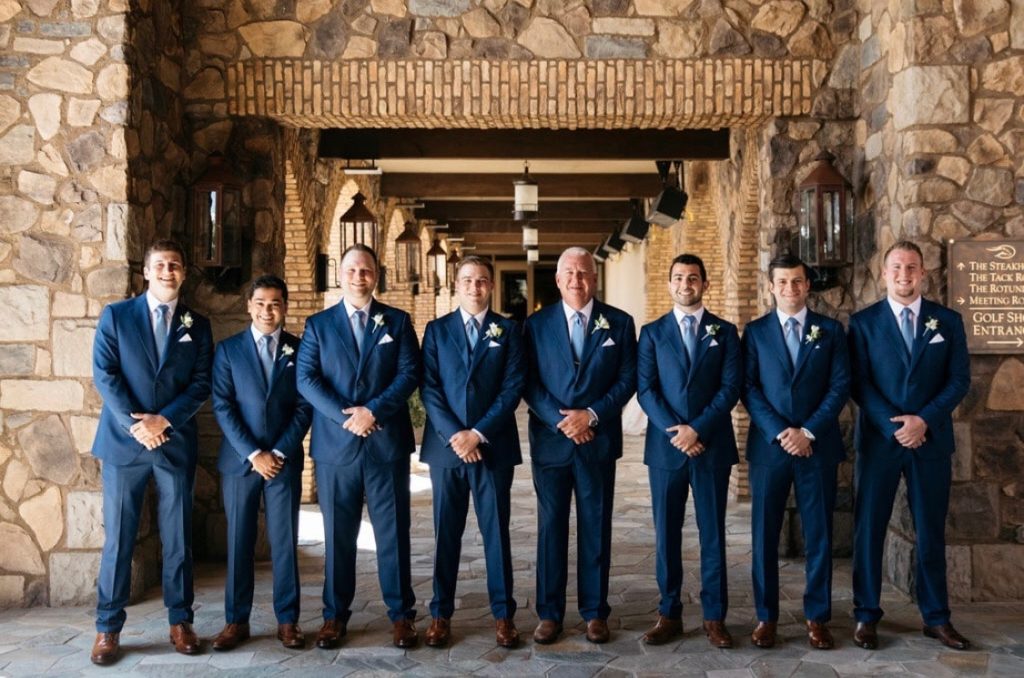
First, determine what direction you want to go in. That is, do you want a more formal and cohesive look? If you want the look to be tight-knit and styled to a T, you can choose matching groomsmen attire. This is the more traditional option in wedding attire, but it’s not required. Another option is to go for a look that’s more broken up. Doing so allows your groomsmen a bit of freedom to express themselves on your big day.
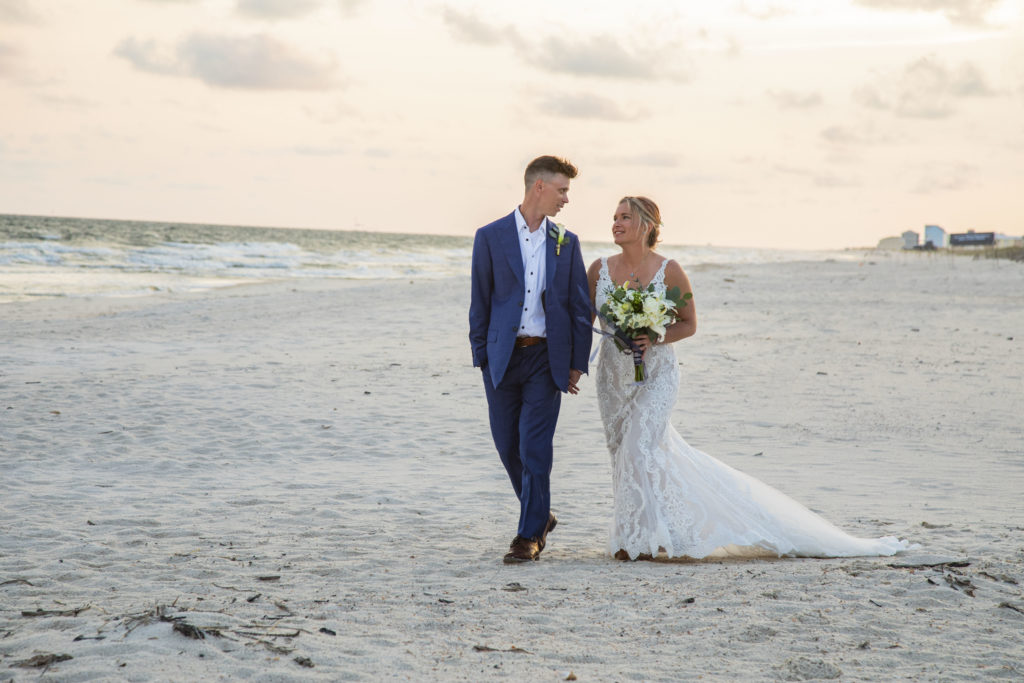
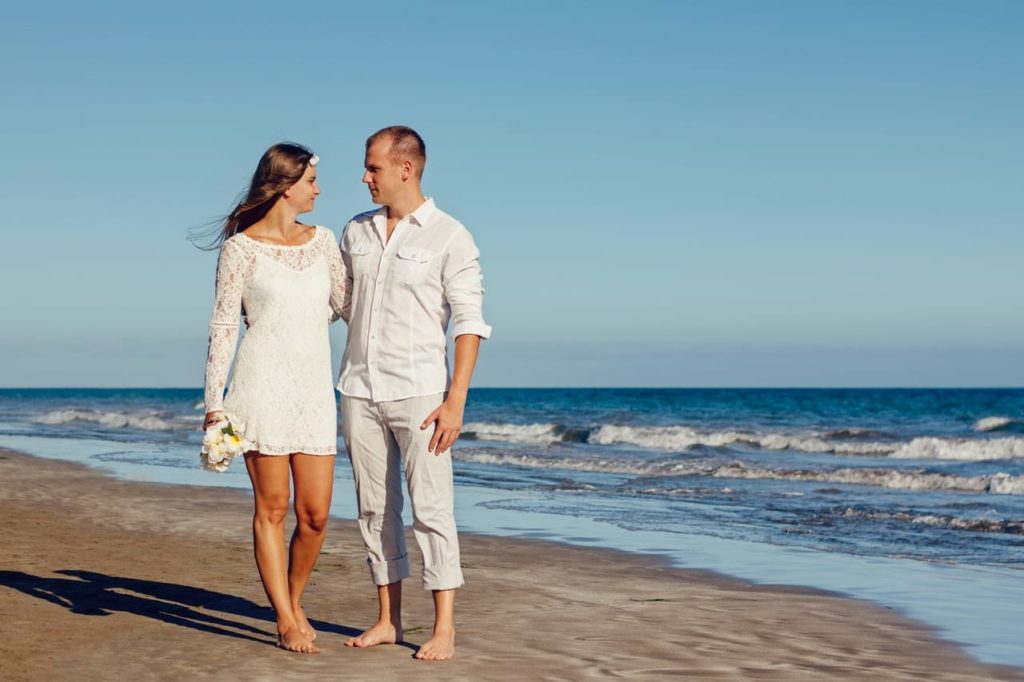
Consider the tone, theme, and style of the wedding. The days of requiring three-piece suits in weddings are long gone. What is your wedding dress code? Weddings can have a wide variety of themes, tones, and styles, from beach-themed to rustic to black tie. Considering the theme, you want your party’s attire to match the tone and season of the wedding. Obviously your guys would stick out like a sore thumb if they wore tuxedos to a beach wedding!
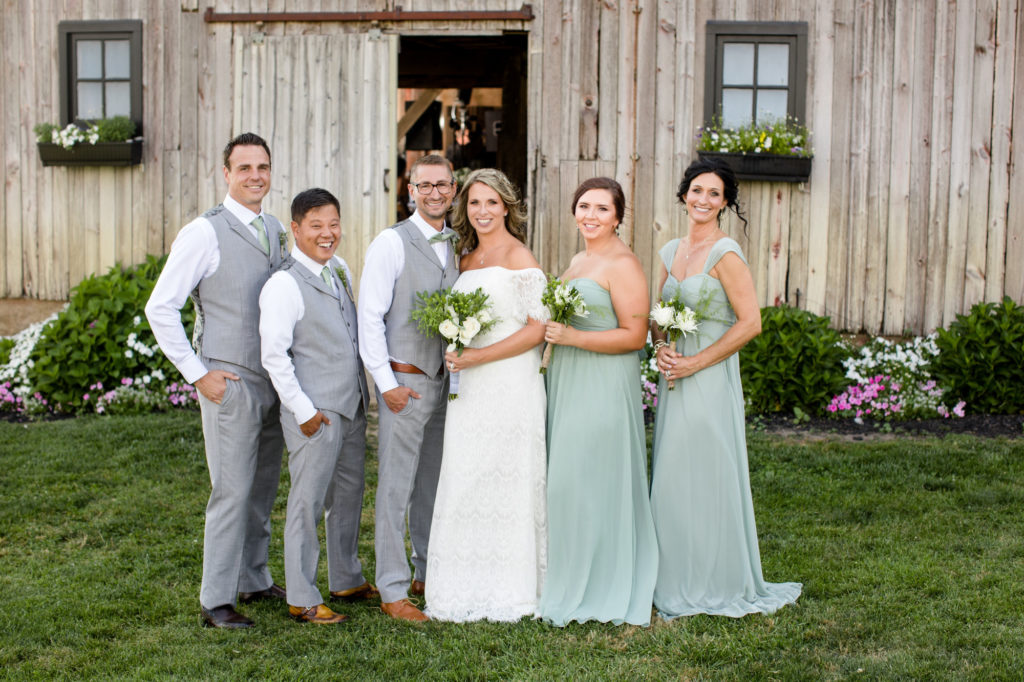
While you do want your group to look formal, there are a lot of options for groomsmen attire for any theme imaginable. Doing a rustic theme? Consider forgoing the jackets and dress your guys in suspenders and a bow-tie. Getting married by the sand and the waves? Try lighter linen suits. Are you a country couple? Clean dark denim, a crisp white custom shirt, and cowboy boots look great. That is, so long as they look neat and tidy. All in all, you want your party to fit in well with the style your wedding is going for.
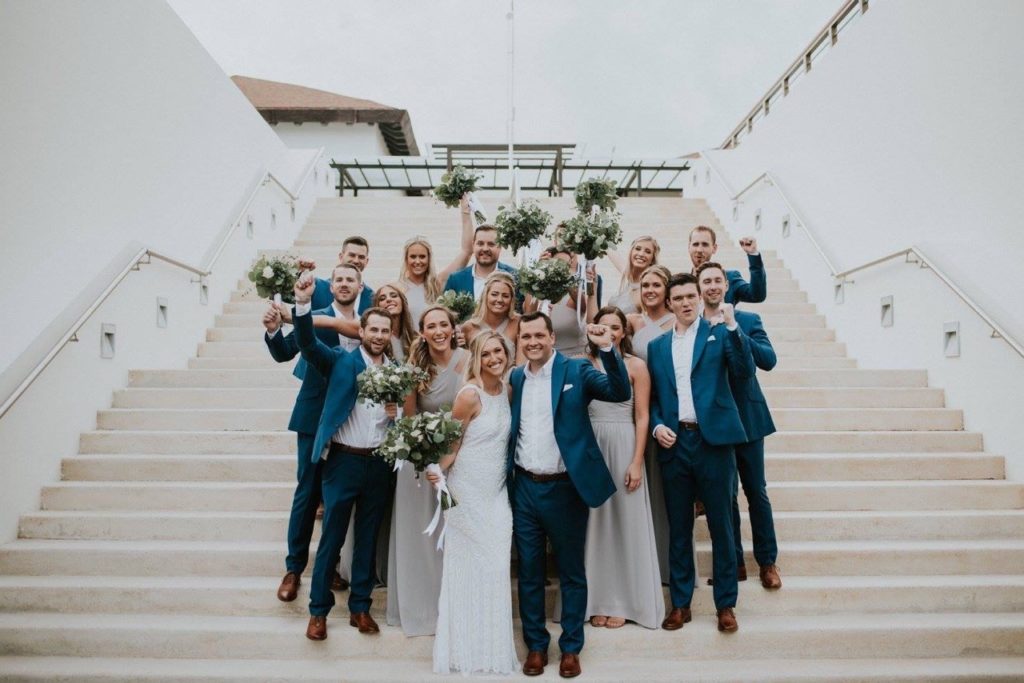
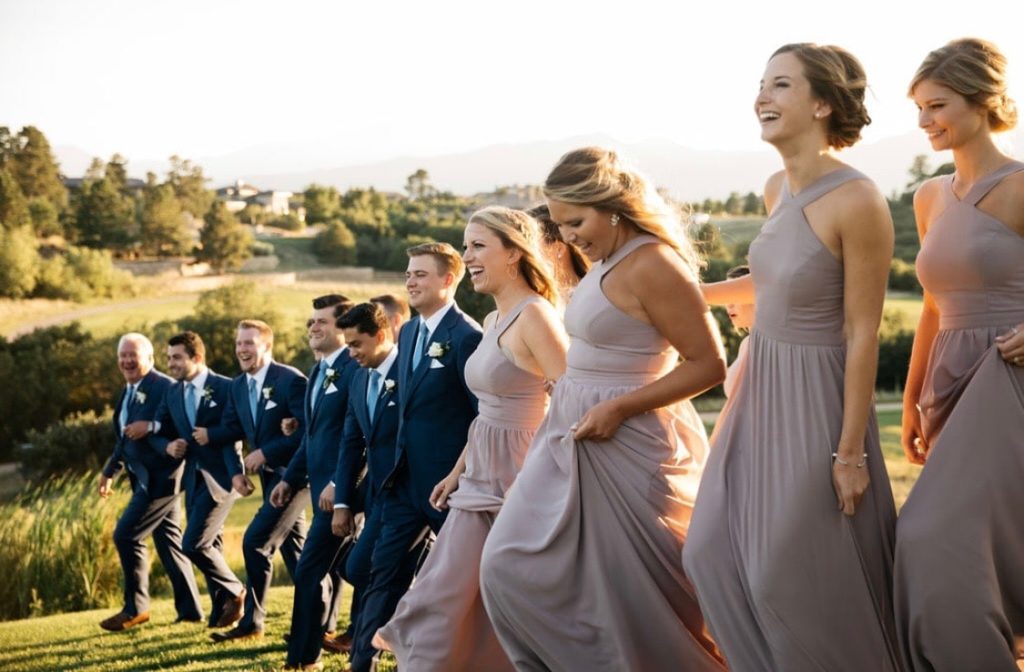
So you’ve perfected the look of your groomsmen so they blend with your attire. Remember, you need to be sure their look complements your partner’s party as well. Your groomsmen don’t have to match your spouse-to-be’s party perfectly, though. So long as they have similar elements here and there, or common colors, everything will look great. In fact, you do want there to be a little bit of variety between the two parties. All in all, you and your partner’s parties say a little bit about who you each are as people.
The most common way to tie the two parties together is to use elements with similar colors. You can either use colors from the same family, or you can have them use a separate color that is part of your wedding’s color palette. Those same colors and will be used throughout the ceremony in other elements, such as bouquets, seating, or decor. HARTTER MANLY’s customers often match their garment’s button stitch to either the bridesmaids’ dress color, or match the tie and/or pocket square.
Typically, groomsmen pay for their attire themselves, whether they purchase the look or use a rental service. Your groomsmen might come from a different income level than you and even each other, and you want to be sure that you’re not throwing a massive unexpected expense at them. Keep the cost in mind as you’re building your look, and get your groomsmen’s thoughts up front on what they are comfortable paying.
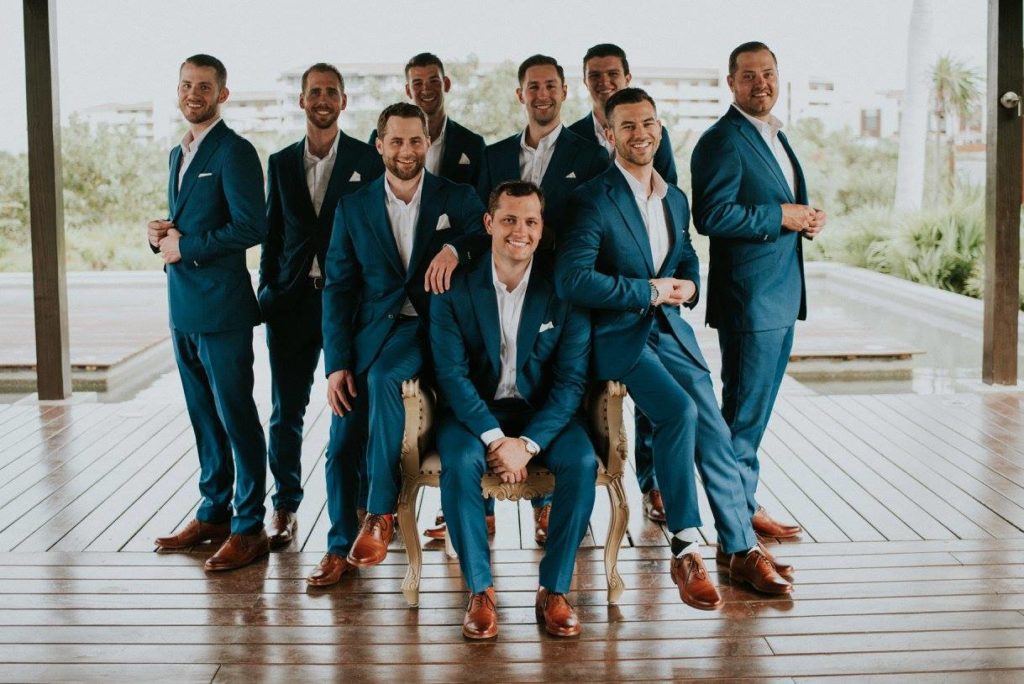
Your groomsmen are probably of all different shapes and sizes. You want to pick a look that is going to look great on all of them. If you are worried about the look you pick being unflattering on certain guys in your party, consider giving them the basic parameters – color, fabric, elements like tie and pocket square – and then allow them to find a fit that works for their shape. In a situation where they are all of vastly different shapes, it may be a good idea to go with the concept we mentioned at the beginning: having them all wear different things with some smaller elements in common, or go the custom fit route.
There’s a lot of work that goes into making your big day perfect for you and your partner. Every single element says something about you two as people and your relationship as a whole. Dressing the wedding party is one of the most important aspects of creating a wedding to remember, and there are many different approaches you can take when crafting your look. Sit down with your guys and your better half and talk about the style and tone you want your wedding to have, deliberate a bit, and use these guidelines to create the perfect look for your big day. If you are interested in renting versus buying, check out HARTTER MANLY’s Rental Options. Happy planning!
Suits can be tricky: there are a lot of nuances in suit construction and fit that can make or break a look. No matter the dress code, the jacket, shirt, and trousers all have a variety of aspects that must work together for the suit to look well-fitted and neat. Today, we’re going to look at the different elements of a suit, and talk about how to determine if your pieces have a proper fit. If you are in need of a new suit immediately, check out our suit selection that we can customize to get the right fit for you. You can also read up on our guide to your first custom suit.
First, when trying on your suit, you want to make sure you are standing in what is called the ‘natural stance’. In such a stance, you stand straight with your feet placed slightly apart and your arms hanging loosely by your sides.
The jacket easily has the most elements that you need to consider when analyzing the fit of your suit. You must consider the space around the button, the collar, the sleeves, and the back panel, which includes the vents and length. The most important aspect of a jacket’s fit is the shoulders, because they act as the framework for the rest of the jacket and its drape over your body.
The shoulders should lie flat, with no ripples or lumps. Ripples or lumps are indicative of shoulders that are either too long or too short.
If the shoulders are too short, lumps appear because the edge of the suit shoulder pulls back over the the top of your actual shoulder. On the other hand, when the shoulders of a suit are too long, excess cloth hangs over the edge of your shoulder. The excess cloth forms lumps and ripples.
As a guide, wear shoulders that are slightly wider than your own shoulders. Doing so ensures there is room for the meeting between the shoulder and the arm to rest over the dress shirt without pulling taut.
Next, look at the buttons. If you’re in your ‘natural stance’, fasten at least one of the buttons. How does the jacket look when it’s stretched around your torso? If the lapels hang down and angle off your chest, the fit is too loose. If the jacket material pulls the button taut and the bottom corners of the jacket are flare outwards, it is too tight. As with the shoulders, you want no strain and no wrinkles.
Your collar is somewhat similar. If it’s too loose, it will hang back and won’t rest flat against your neck. If it’s too tight, it will bunch around the collar. You want it to rest against your neck and be closely fitted, but not too snug. You should be able to fit one or two fingers in between the collar and your neck itself. A poorly fitting collar could be because the size of the collar isn’t right for your body. Other reasons could be due to poorly fitted shoulders or an incorrect size for the back panel.
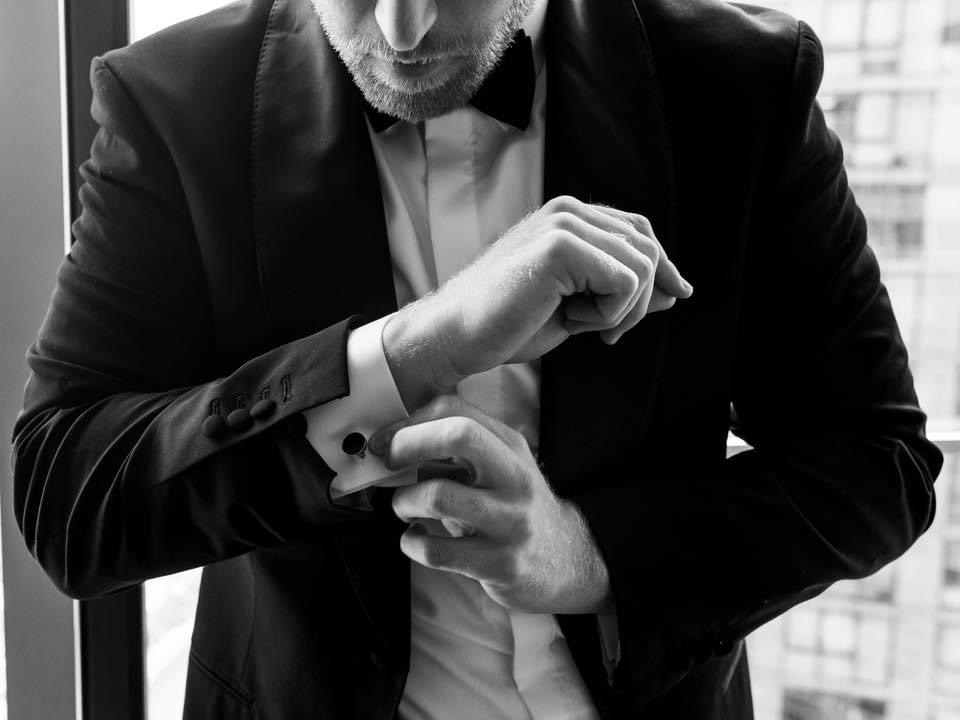
Speaking of the back, the length should fall just along the curve of the buttocks. From the side view, the bottom hem of the jacket should sit right at the middle of the hand. The vents of the back panel should be sitting flat. That is, they should not pull outwards. If they do, then the fit is too tight. The sleeves come down to one thing: the amount of shirt cuff that is showing underneath the cuff of the jacket. You want there to be about half an inch of shirt cuff peeking out.
The shirt is not quite as complicated as the jacket, even though it obviously contains many of the same elements that the jacket does. Much like the jacket, the collar should be snug, but there should be room for one or two fingers.
Compared to the jacket, the shoulders of the shirt should be an even closer fit. You don’t want any over-extension at the point where the shoulder meets the arm. Therefore, it should be as close a fit as possible without being tight. That’s because if the shirt is too tight, the shoulders will bunch up.
The shirt sleeves should end at the break of the wrist. You can identify the break as the point where the large wrist-bone is. Stylists recommend having about a half-inch of shirt cuff peeking out from underneath the jacket sleeve. The shape of the shirt should be slim against your torso with a natural taper near your waist. For shirt length, you want enough extra fabric to easily tuck the shirt in. Not only that, but there should be enough that if you lift your arms, it won’t untuck on its own. A good guide is that the extra fabric should reach the v-shaped panel at the top of the inseam.
The waist of your trousers should be snug, but not tight. They should stay up on their own without a belt. The seat should rest flat against the undergarments, without pulling tight or draping too loosely. If the seat is too tight, you will have lines just under the buttocks where the fabric is stretching. If it is too loose, the extra fabric will drape down over your thighs.
The fit of the legs should be straight, with a very slight taper as the pant moves down the leg. They definitely should not flair out, but they also shouldn’t end up too tight around the ankle. That is, unless you want to look like a skater wearing skinny jeans. You want the legs to taper at a slight inward tilt, but still have room for movement. The ‘break’ – or the point where the hem of your pant meets the top of your shoe – is the most crucial part of a trouser fit. You want it to just rest on the top of your shoe. It should result in a slight inward dip right above the front of the pant leg. The break should hit right where the two elements meet.
When you put all of these together, a description of the right fit seems a bit redundant, but it’s the truth: you want everything to lie flat, for the majority of the elements. If your pieces are too tight or too loose, it will cause ripples, strains, and lumps that diminish the elegance you hoped to convey by wearing a suit in the first place. Now that we’re tying it all together, these things seem obvious, but we hope that the specific guidelines we’ve put forth here will help you look at all the elements individually, so that you are left with a perfect fit, every time.
Ready for your perfect fit? When we make our custom suits, we alter a pattern with your exact measurements. The pattern fits your body before we start constructing the suit, which produces a suit that’s a perfect fit. Even better, our H|M Mobile Tailor calculates your precise measurements down to a millimeter straight from home. All it takes is two photos from your smartphone camera.
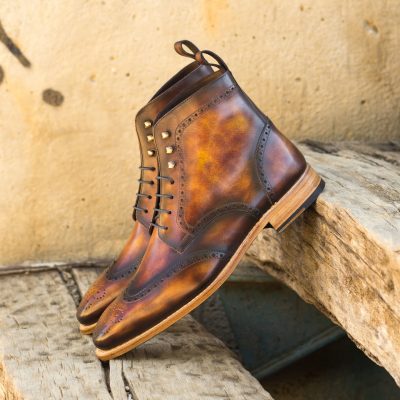
Quality shoes are complex: they have a wide variety of construction methods for every aspect of the shoe, and these options all have their pros and cons. You may be considering whether to go with a Blake Stitch vs Goodyear Welt, or you may even be considering something else. In the shoe welt showdown, we are going to look over shoe welt types, and what you need to know when making a decision on the type of shoe welt you want in a pair.
Put simply, the welt is the layer of material that rests between the insole and the outsole of your shoe. A shoe welt is a structural layer providing support and durability to the shoe’s construction.
The shoe welt lays between the insole and the outsole and serves a few important purposes. The welt layer is essential in order to create extra support and water resistance. Choosing the right shoe welt type makes for a superior, more durable overall construction.
In reviewing the Blake stitch vs Goodyear welt, you will need to be familiar with some general shoe terminology.
The insole of a shoe is the layer of material your foot makes contact with when you’re wearing your shoes. The outsole is the layer that makes contact with the ground. Another term we will be using here is the upper: the pieces that construct the main portion of the shoe, the portion your foot goes into.

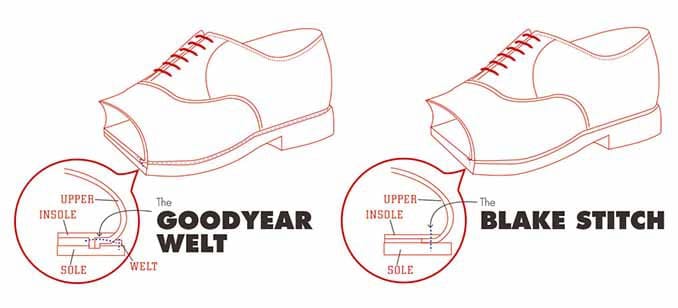
There are three main varieties of shoe welt types when it comes to attachment, but we’re going to look in depth at two today. The third shoe welt type is called cementing, and it’s simply gluing the layers together. It’s cheap, easy to do, and is usually found on more casual shoes that are less well built. Here, we’re going to mainly focus on the Goodyear and the Blake welt. When comparing a Goodyear welt vs Blake welt, both of these shoe welt types are high quality. As with many garments, the more durable options speak to a higher quality product.
In a Blake welt, the upper wraps all the way around the insole, resting between the insole and the welt layer. A single stitch pushed down through the insole passes through the upper, the welt, and the outsole. It comes to rest perpendicular to the shoe’s layers.
Industrial and flexible – the Blake welt is more common than the Goodyear. It’s more common because it’s easier to construct. The Blake welt’s industrial construction method requires a specific machine and cannot be done by hand.
The Blake welt is simpler to construct compared to the Goodyear. It does require a specific machine to create, but on the whole, it is less expensive than a Goodyear welt. The stitch goes through only a few layers, making it more flexible. Because of its simplicity in construction, resoling is simple as well.
Most shoemakers and footwear connoisseurs consider the Goodyear to be the superior among all shoe welt types. Custom and intricate, the Goodyear welt is less common and more complex than even the Blake Welt. Overall, the Goodyear welt is more expensive to construct than other shoe welt types because the design is more intricate. Not to mention, shoes with Goodyear welts are handmade. Because of the intricate hand-construction, the welt is also more durable compared to a Blake Welt.
A major benefit of the Goodyear welt is that the two separate stitches makes for an easy resole. Also, while they are more expensive to construct up front, due to the extra materials and manual labor required, the lack of necessity for a specific machine makes for a less expensive resole. While the ribs make for a less flexible shoe, it is more supportive, durable, and water-resistant.
When picking a welt style, your choice comes down to trade-offs. In the Shoe Welt Types Showdown, we’ve highlighted some of the pros and cons, now it’s just down to what you’re looking for and what you’re willing to forego. When it comes to deciding between the Blake Stitch vs Goodyear Welt, keep in mind that if you’re looking for a hardy shoe that is going to last you for many, many years, go with a Goodyear. The Goodyear welt, with its durability, more involved construction process, and resoling capabilities, is widely considered the superior welt.
Therefore, we strictly offer Goodyear welt shoes here at HARTTER MANLY. We want your shoes to last a lifetime and to only fit better with time. Like most elements of a man’s wardrobe, it’s a good idea to have a variety of options. If you’re only looking to invest in one pair of shoes now, take these tips into consideration. Head over to our store and shop our shoe collection, or book an appointment to customize the perfect pair for you.

Weddings are fabulous affairs, but dressing for them can be a bit tricky. The good thing is, the happy couple will almost always give you a dress code in their invitation to work with. So there’s no need to worry about showing up to their big day sticking out like a sore thumb. But what does “Dress to Impress” mean for a wedding? What about a “Black Tie Optional” or “Casual” dress code? We’re going to look at the most common wedding dress codes and tell you a bit about what they mean for you as a guest.
The wedding dress codes we will cover are white tie, black tie, black tie optional, semi-formal, dress to impress (festive), casual, and destination. Clearly, there are a lot of options that the couple can pick from when organizing their big day, and it’s important that you as a guest dress appropriately for the occasion.
A white tie affair is what you can expect for the Met Gala. It is the highest level of formality there is for events and wedding dress codes. For the men, there isn’t too much opportunity to express yourself or have fun picking out your look. That’s because the goal is for everyone to look extremely similar and, of course, extremely formal. A white tie dress code requires a tuxedo with tails – no exceptions – and a formal white shirt and white vest. The expectation is that you will also wear a bow tie, white gloves, and formal shoes like a pair of clean, inconspicuous Oxfords.
The next most formal dress code is black tie. Imagine a party you’d see James Bond himself at. Most people associate this event dress code with evening events. Black tie is similar to the white tie, where hosts expect you to wear a tuxedo. However, there are some slight differences. The main difference is that your vest is typically black as opposed to white. Another option is to opt for a cummerbund. For footwear, you’ll want to wear, for example, black patent leather shoes. While black tie attire is slightly less formal than white tie, the goal is still for the men to look as similar and polished as possible.
Black tie optional can be a bit confusing, considering the existence of regular black tie. The general rule is that a tuxedo is recommended, but not required. If you don’t want to wear a tuxedo, you have options! For instance, you can still maintain a high level of formality by wearing a clean, dark suit, a white dress shirt, and a dark tie. Typically your tie should be in a solid color as opposed to a pattern. This wedding dress code does leave a little more room for creativity, but is still quite formal and is typically used for evening weddings.
Dress to impress, also known as festive dress code is a relatively recent phenomenon, and can be a lot of fun to dress for. The key tenet is that the happy couple wants their guests to have fun with their looks. You’ll still want to wear a suit, but you can play with the look by wearing a fun accessories. Try a bow-tie, suspenders, a patterned tie, or a bright pocket square. Basically, have fun with this one! You have a good amount of freedom here!
You’ve been invited to a destination wedding! Awesome, let’s party! Destination weddings are every wedding guest’s dream invitation, as they usually mean somewhere tropical. If so, the weather will likely be humid and hot, and you’ll want to dress in something nice but also comfortable for the environment. Guayabera shirts are commonplace at tropical weddings. Also known as Cuban summer shirts, they are short sleeved, linen button-downs. You can identify these shirts by the two vertical pleats on either side of the front of the shirt, and the decorative pocket. Wear with linen pants or khakis for a perfect beach wedding look.
As we mentioned at the start of this article, the happy couple will definitely let you know what the dress code is for their wedding. Themes and styles are an integral part of wedding planning. It is important for guests to fit in with the look they are going for as well. We’ve covered seven different wedding dress codes. Take a look at suits, shirts, pants, and shoes designed by HARTTER MANLY.
With the tens of thousands of customization options, you can create the perfect look for the next wedding you find yourself attending!
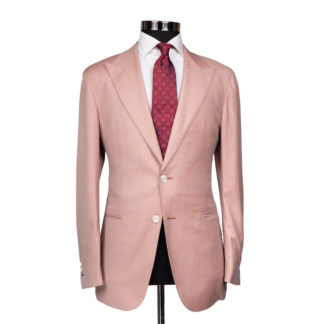
Additionally, two of our top selling suits are available for rent: our royal-blue peak lapel suit, The Charlotte Spirit, and our stunning black tuxedo, The Hawkeye. Both are great wedding options for every dress code, from dress-to-impress to black tie. No matter the wedding dress code, HARTTER | MANLY has something to suit you exquisitely.
Want more pointers/tips for your wedding day? Book a free appointment with our style experts.

The temperatures have begun to drop, and the sun makes a quick appearance and an even quicker exit. The leaves are falling in a rainbow of warm tones. As the season changes, so should your wardrobe – not just for fashion, but for function, as well. After all, those temperatures are indeed dropping. This guide will tell you exactly what you need to know about Fall fashion and dressing well for the season. We cover colors, patterns, fabrics, and even footwear that will have you looking and feeling your best this Autumn.

In Fall, you will want your look to be made up of darker, warmer tones – much like the falling leaves. Mustard yellow, dusky orange, rich browns, and burgundies are all colors you can use to match the season. Colors that don’t quite go with this theme but can still work just as well are olive green and navy blue.
Typically, you will want your jacket and pants to match, since Fall fashion colors are typically more muted. But if you want to stand out a bit, wear a contrasting shirt and tie to spice up the look. Read our full guide on layering for the inside scoop on mixing and matching your layers.
Of course, you can mix and match, but you’ll want to keep within the general color guidelines we mentioned above.
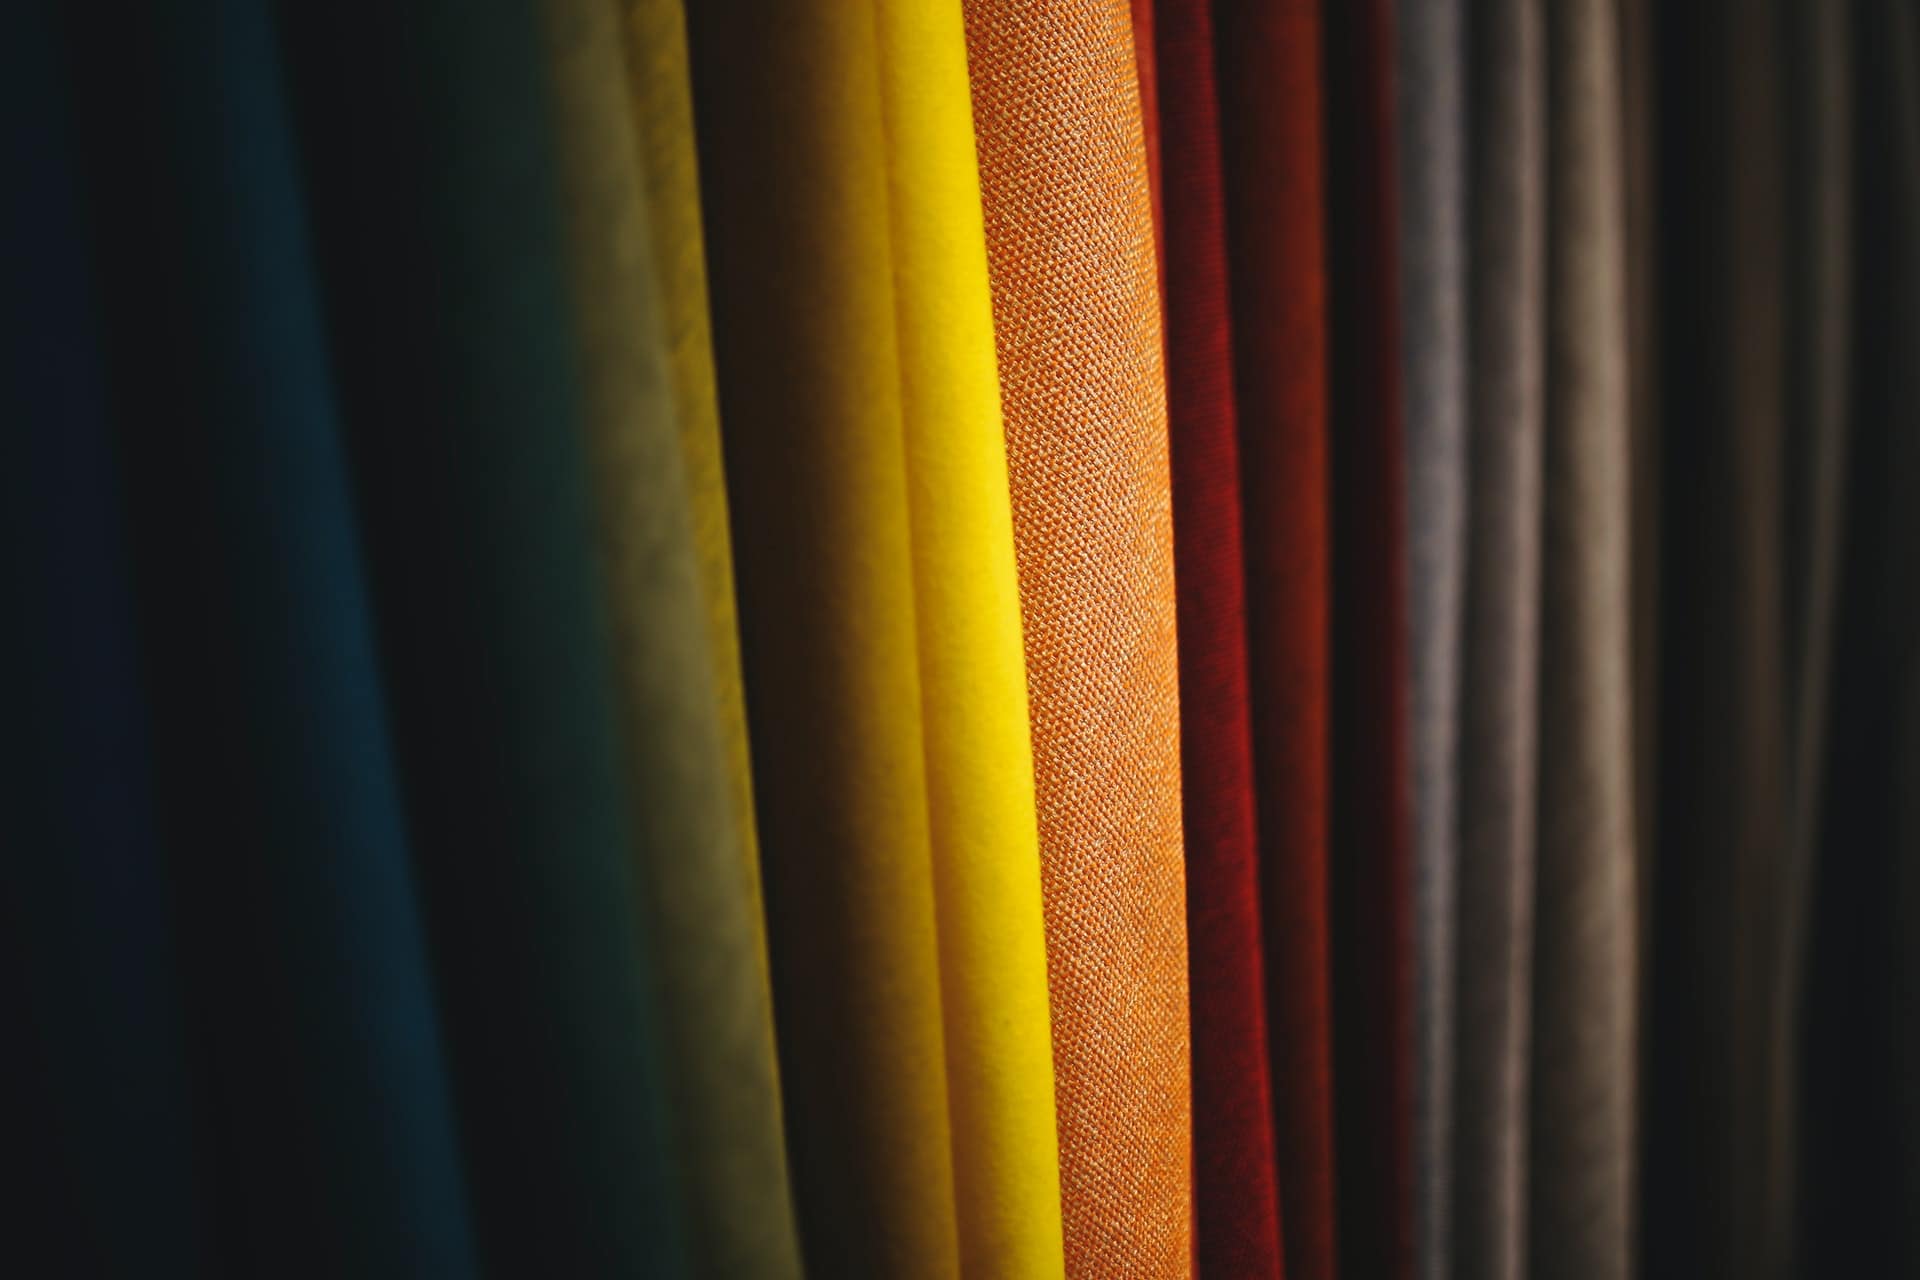
Wool is the number one fabric for Fall styles, but it comes in a variety of knits and constructions. Most commonly used is worsted wool, which contains straight, parallel fibers that have been combed until even and smooth. It is what you will find on most traditional suits – it has a flat and even appearance due to the combing and positioning of the fibers, and creates a clean, tailored look. Another option is wool flannel. Wool flannels are made of worsted wool, but after weaving, they are brushed to create a raised texture, or a nap, resulting in a very soft-to-the-touch fabric.
Tweed is a classic fabric in menswear and is especially suited for Fall fashion. Carded wool, as opposed to combed, is the base of tweed. A card is a board covered with fine metal teeth. The cards run over and through the wool to separate the fibers, clean them, and disentangle them, until the material is a fine web. Next, a spinner spins the web into a continuous strand. The continuous strand, known as a sliver, is ready to weave. Carded wool is bulkier, raised, and more flexible, as well as quite a bit warmer. Because the wool is first carded, tweed has bumps and a raised texture. The texture creates a pliable surface that has a better drape.
The most quintessential pattern for Fall fashion is plaid, which is created by overlapping multiple bands of colors both horizontally and vertically. Plaid is a very versatile pattern: you can wear bright and contrasting colors with a wide-set plaid for a trendier look, or you can keep the color palette more monotone and keep the checks smaller for subtlety. Check out all of our HARTTER MANLY Sports Jackets to get the perfect plaid jacket for this fall season.
A third common Fall pattern is Herringbone, which looks much like the skeleton of a fish – hence its name. Herringbone is made up of parallel columns of chevrons placed in alternating directions. The detail of Herringbone is often so tiny that you can really only see the pattern up close. Comparatively, from farther distances the pattern looks more like a solid, which gives you subtle elegance and sophistication.
With the monk strap, you can use a single for a more subtle look or go a bit more bold with a double. Single monk strap shoes are a clean, elegant style. Double monk straps, on the other hand, are a modern twist on the classic.
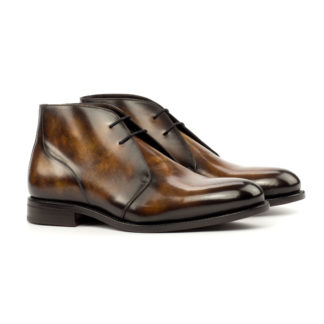
Chukkas – ankle-high boots with open-lacing and two or three pairs of eyelets – are stylish almost any time of year, but to really fit in with the Fall aesthetic, you will want to go with a leather pair.
Brogue is not a style of shoe, but a design style usually seen on oxfords. To play up the Fall vibe, wear a pair of boots with a brogue pattern (the stylized perforations on the toe of the shoe).
Of course, if you’re not a boot guy, some traditional low-rise oxfords work just as well for Fall. Check out our collection of Oxfords to shop shoe styles for Fall.
Fall is a fun season to dress for, with lots of options. These are guidelines to help you narrow it down a bit, but the possibilities are endless. With the tips in this guide, and the thousands of possible combinations you can achieve when building a custom look with us, you are now more than ready to step into Fall in looks that you can be proud of. Book a free appointment with our style experts to get to work on your newest custom piece for fall.
Layering is an art, but it doesn’t have to be complex. While we here at H|M specialize in suits and more formal wear, we want to be a resource for you no matter what you’re wearing. So today we’re going to discuss the art of layering. Here’s how to achieve a comfortable, versatile style that looks as great as it feels. Layering is most beneficial in Spring and Fall, when different parts of the day can vary in temperature. In such weather, layering allows you to stay comfortable all day long, while still looking great.
There are three main rules you want to follow, which we will discuss below. We include some tips and tricks to make sure that all the individual pieces of your outfit work. Specifically, we want to make sure the pieces work for you and work together. Before we get into that, though, let’s talk about the different layers that make up a put-together layered look.
For your shirt layer, a dress shirt is always a good bet. It’s definitely the most commonly used shirt layer, especially in more formal settings. But dress shirts are also not your only option. Polos and Henleys are common as well, depending on if you want to go more sporty or more casual.
Depending on the weather where you are, you can use an optional shell layer, which serves more as a function piece. For instance, a thin, weather-proof raincoat is a good example of a shell layer.
If you’ve gone quite simple with your look and you still want to add another layer of style, consider accent pieces. Accent layers like hats, scarves, gloves, or jewelry can add a lot of style if done correctly. A well-made watch is a stand out piece against a custom suit. However , if you already have some very bright colors or complex patterns, avoid any extraneous pieces. If your look does have bright or complex patterns, keep accents on the subtle side. As a general rule, you want your clothing to do most of the work for you. That is, let your accent pieces be small touches that give just a bit more panache to your look.
In order to have a cohesive look, avoid having patterns or fabrics of different intensities on randomly placed layers. You want to make your patterns progressive: lightest to strongest. There is no hard set rule on whether light goes on the inside or the outside – you can wear it either way. Make sure that no matter which layer your light pattern goes, the farthest layer from it has the strongest pattern, with medium intensity patterns going in the middle.
For example, if you’re wearing a solid color shirt in a more neutral hue, you will want your outer layer to be either a brighter color or a pattern other than solid. In the middle, you could use a slightly brighter hue of the shirt’s color, so that your look gets progressively more bold, from the inner to the outer layers.
This rule is quite simple: part of the art of layering is learning how to balance. Having a bright color for every layer will look loud and obnoxious. You can absolutely use bright colors when layering, but keep it to one or two of these shades and keep everything else more neutral.
The core purpose of layering is to allow the wearer to shed or don the layers throughout the day to maximize comfort. Because of this, you don’t want any of your layers to be something you wouldn’t wear on its own. That’s because if you decide you don’t want that layer shown because you don’t like the way it looks by itself, it defeats the purpose. When putting on a layered outfit, stop in front of your mirror after you’ve put on each layer, analyze the look, and determine if you would feel comfortable going out in the look as it is just then. Once you’ve determined it works, add another layer, then stop again and survey the look. Do this until you have your last layer on and take one last look. Make sure everything looks great all together, and then you are ready to go tackle the day.

Would you like a more precise recommendation? Use the Feetsizr app to measure your feet for the perfect fit.